Post by tyranidnz on Oct 7, 2007 10:15:22 GMT
Ok lets do this.
First off you will need:
Water
Green Stuff
Bark
Crafting Knife
Paints:
Chaos Black
Skull White
Blood Red
Blazing Orange
Fiery Orange
Sunburst Yellow
Codex Grey
Fortress Grey.
Stage 1:
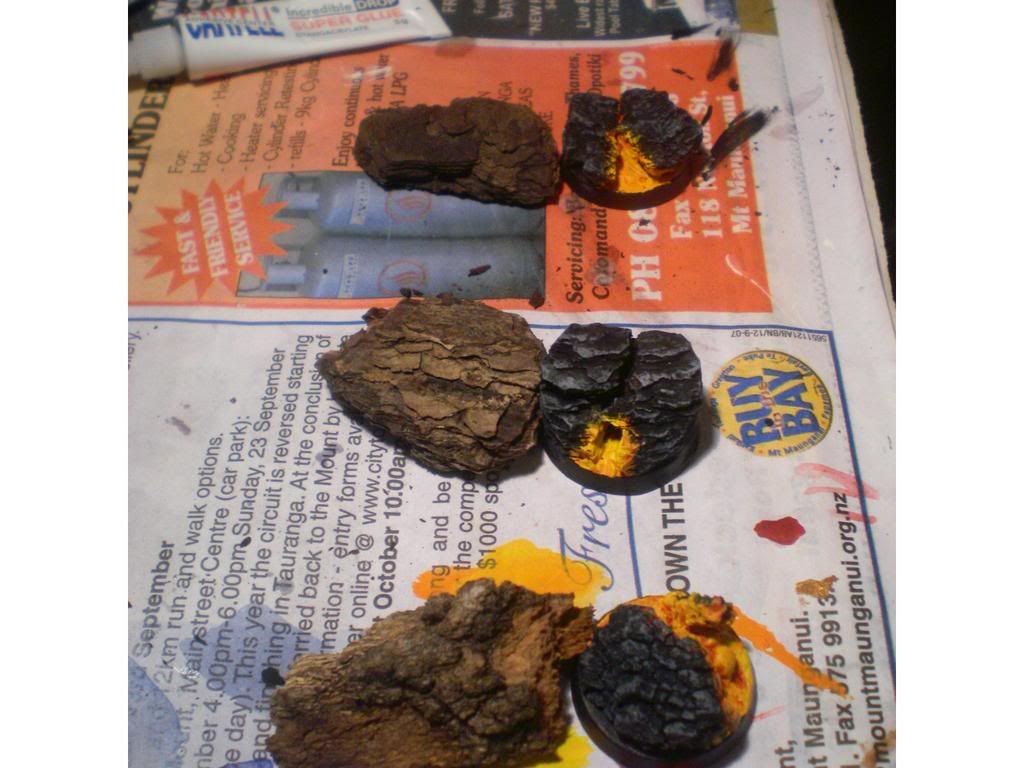
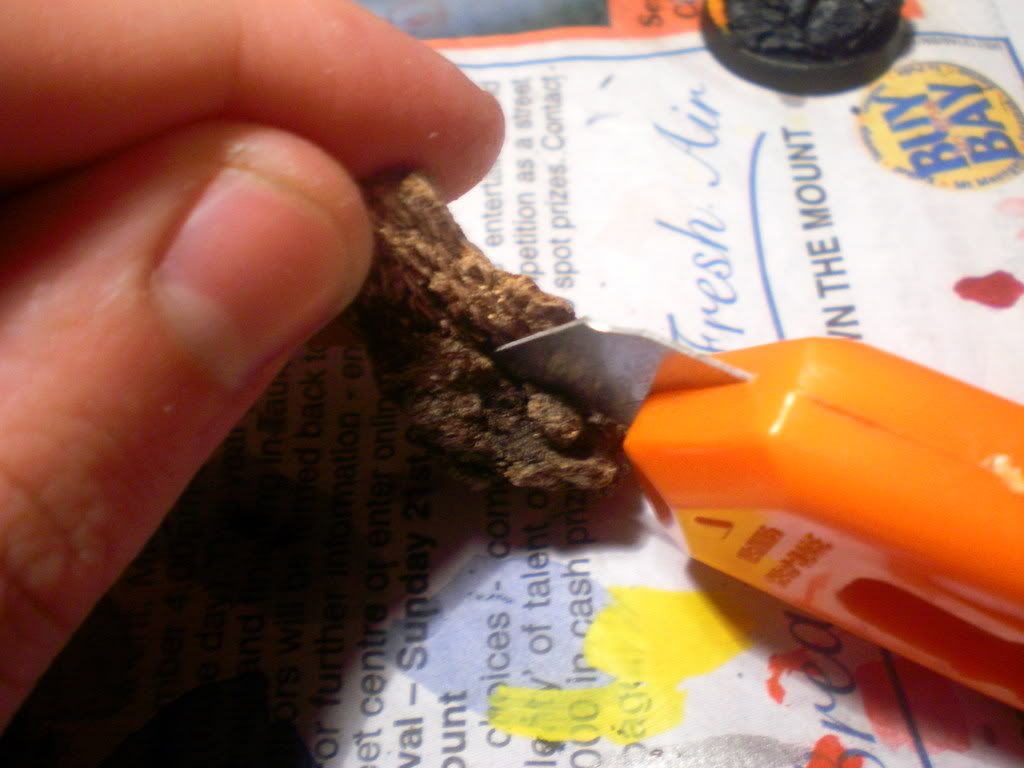
The first stage I guess would be picking the bark that you want for the terrain now most people are probably thinking this guy is nuts its just bark but below is a picture of just how much bark affects the final project but in also saying that differences in bark create a nice sense of randomness to your bases. Anyway cut the bark you choose so that it will fit nicely onto the base but not so high that your model will fall over. You'll also want to have a larger piece of bark(primary) and a considerably smaller piece (secondary) to make a cool volcanic effect.
Stage 2:
Quite simple, glue the primary piece on and try to cover the base slit so you cant see through it (alternatively you can green stuff it at the end of production) make sure this dries before proceeding.
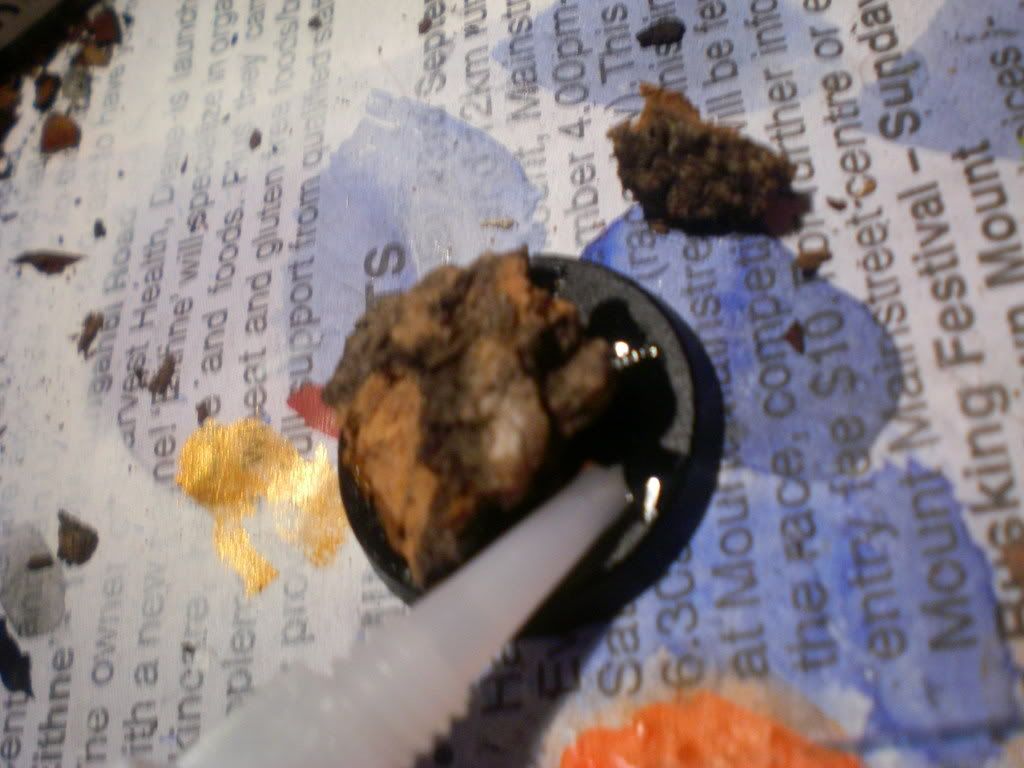
Stage 3:
Now apply your green stuff around the primary bark. Include if you wish a small ball or an opening to create the effect of lava bubbles etc. Smooth around the edges and create slits/ crevices as shown to create the melting appearance. Handy tip: Keep the green stuff wet when applying and sculpting (it helps SO SO SO much).
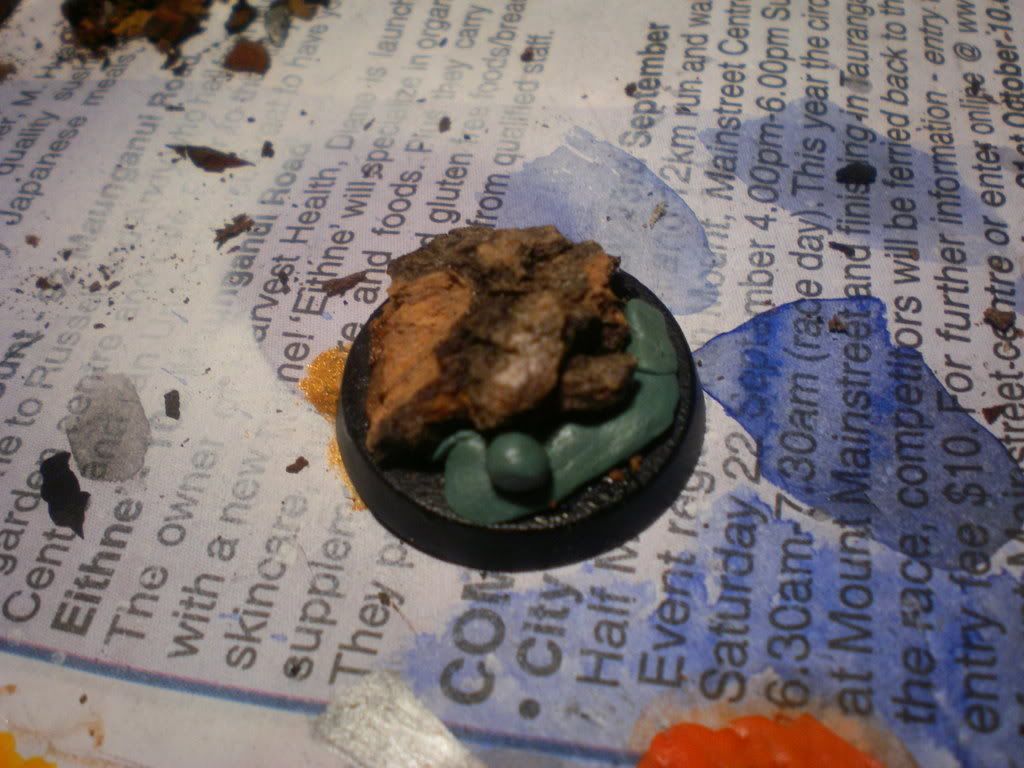
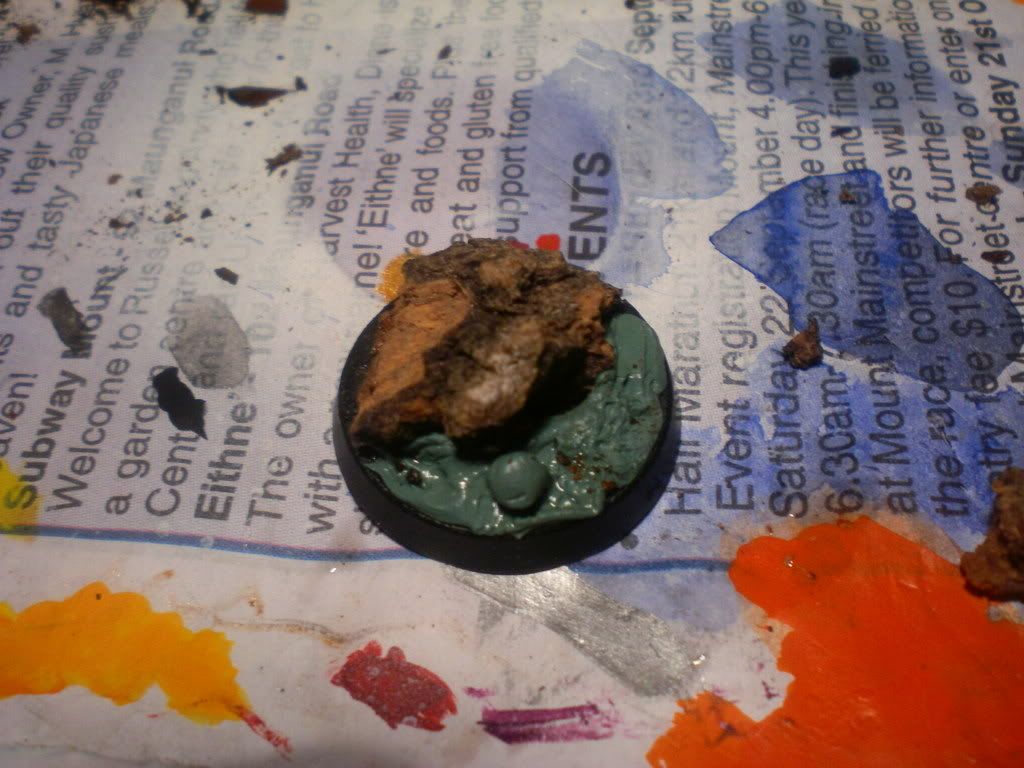
Stage 4:
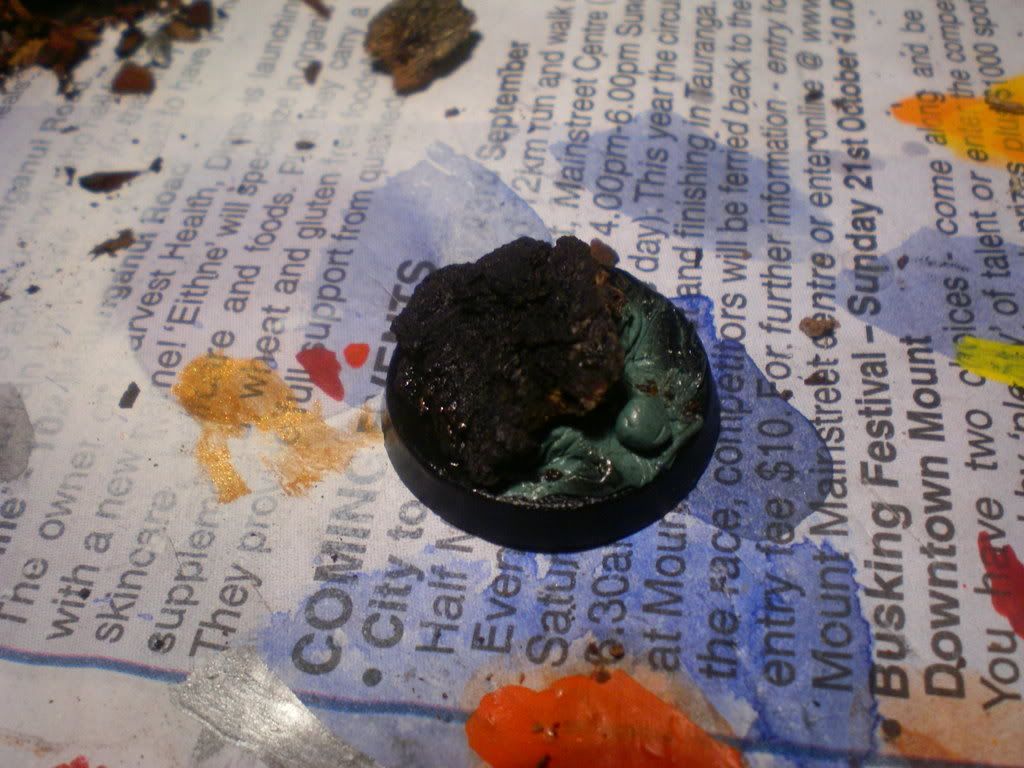
Now the green stuff doesn't necessarily have to be dry for this one just make sure you don't touch it with anything other then paint otherwise its a pain to re-sculpt. Grab that good old chaos black spray can if you have one (shake it good) otherwise normal paint is fine. Try not paint the green stuff though as we'll be painting that...
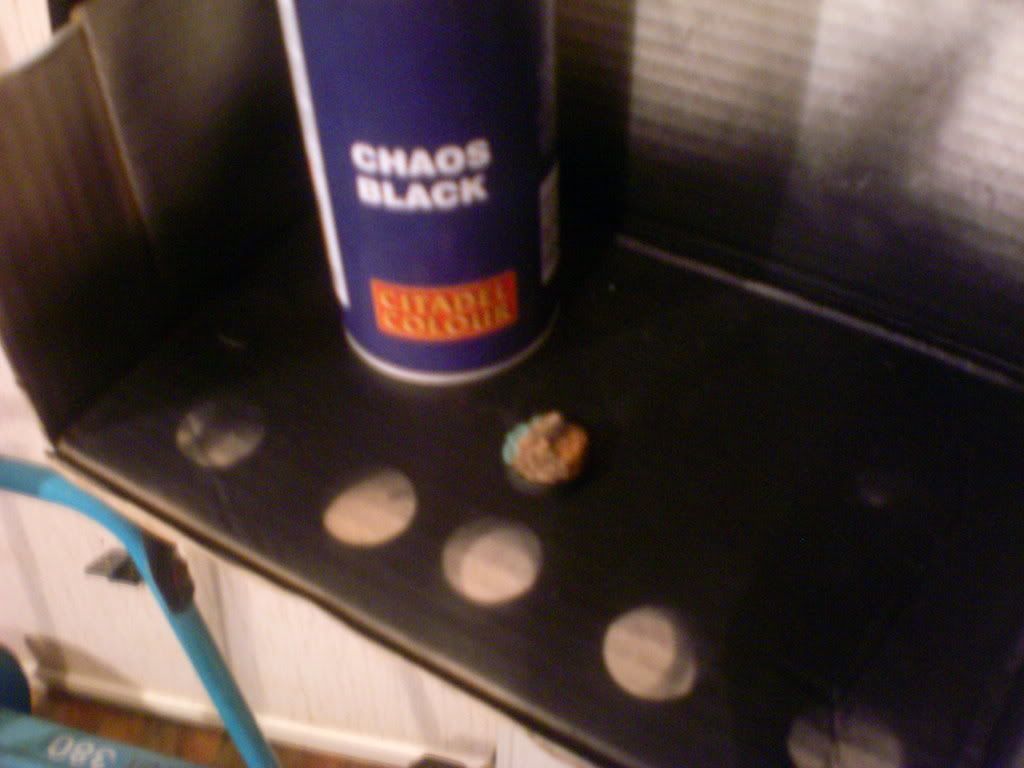
Stage 5:
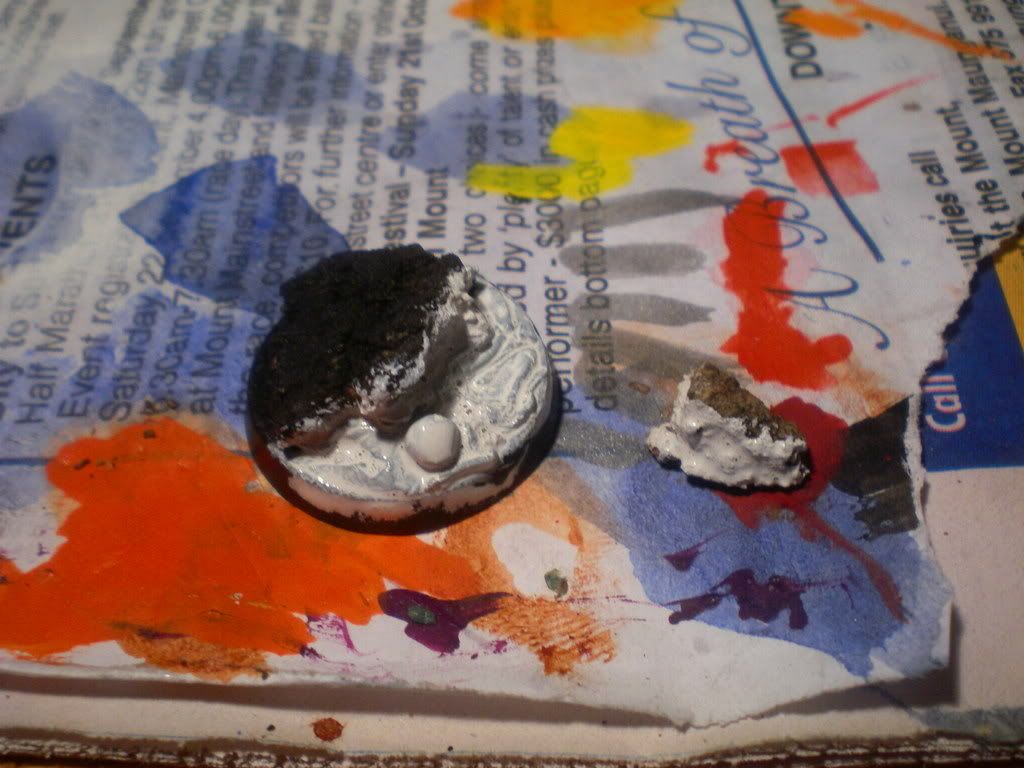
White! Yes white. Water it down a bit though as GW paints are a tad bit thick. Apply only to the green stuff and the inner edge of the primary piece where the lava is just under (Also paint your secondary piece white but only where you think it will be above lava contact.) Should look something like this:
Stage 6:
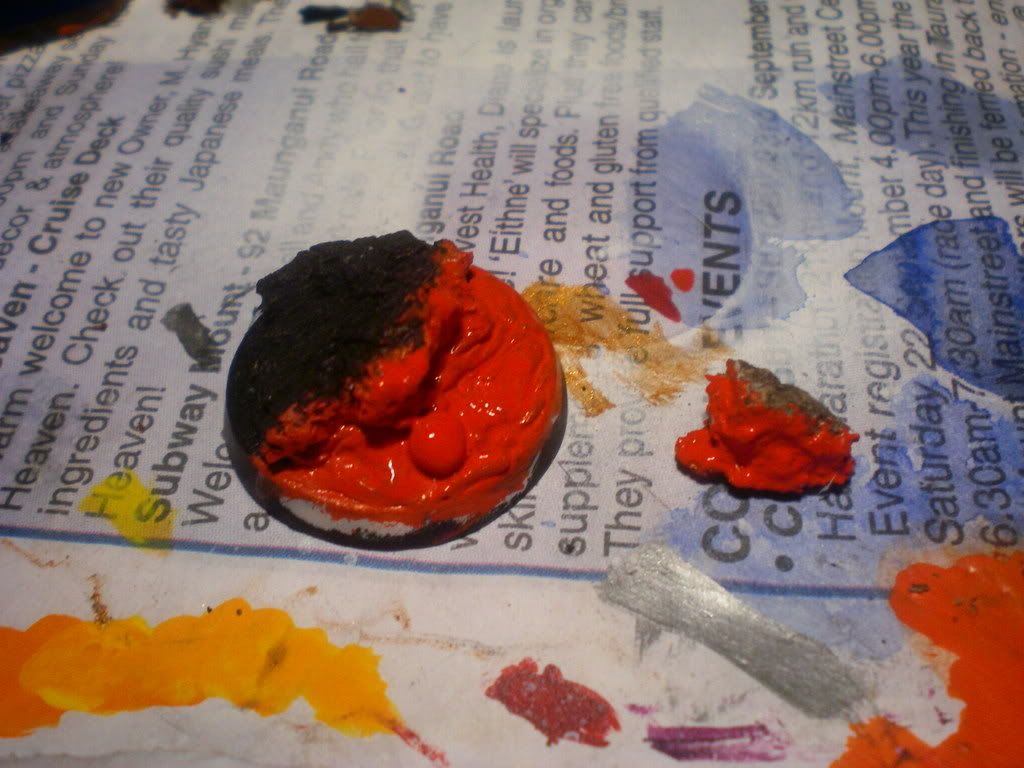
Ok now for this stage we want to get Blood red painted onto the white, don't be afraid to go a little bit over the white as it creates a lighting effect from the lava. Wait till it dries before proceeding
Stage 7:
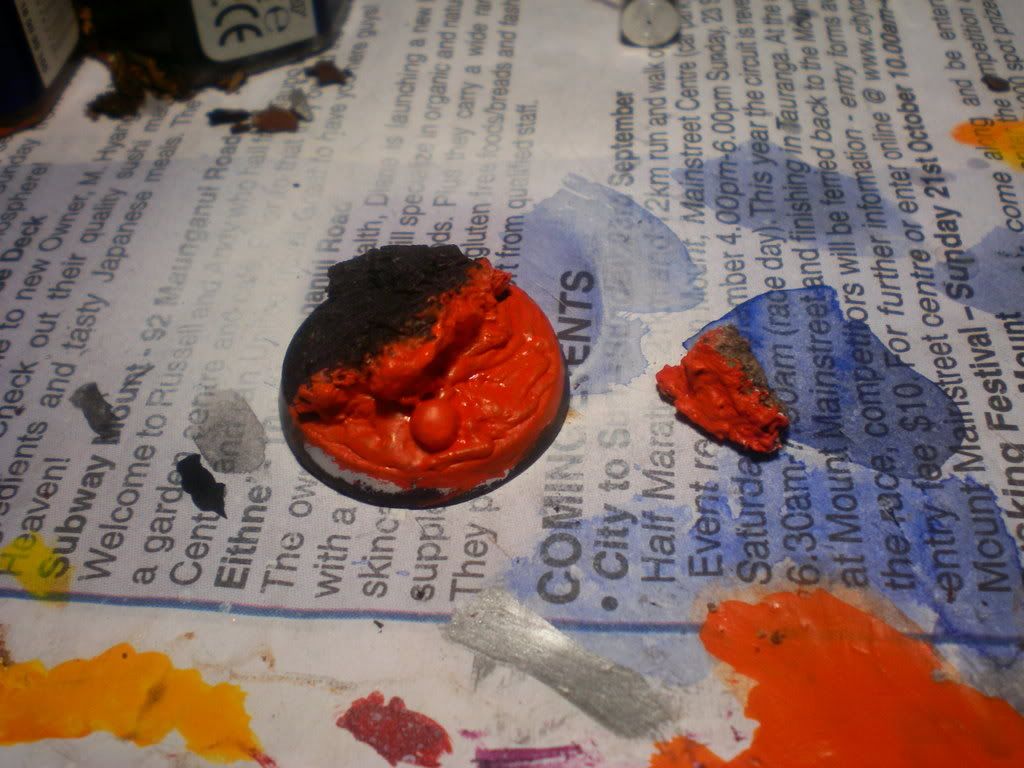
Now we want to paint over that red with a 50.50 mix of blood red and blazing orange, be sure to leave some red showing. Now as shown in the picture you wont notice too much of a difference but trust me its needed. Wait till it dries before proceeding
Stage 8:
This time you'll just need blazing orange. Apply evenly and carefully over the lava almost like dry brushing but without removing so much paint. Leave a little bit of the paint from the last step showing and continue to the next step once dry.
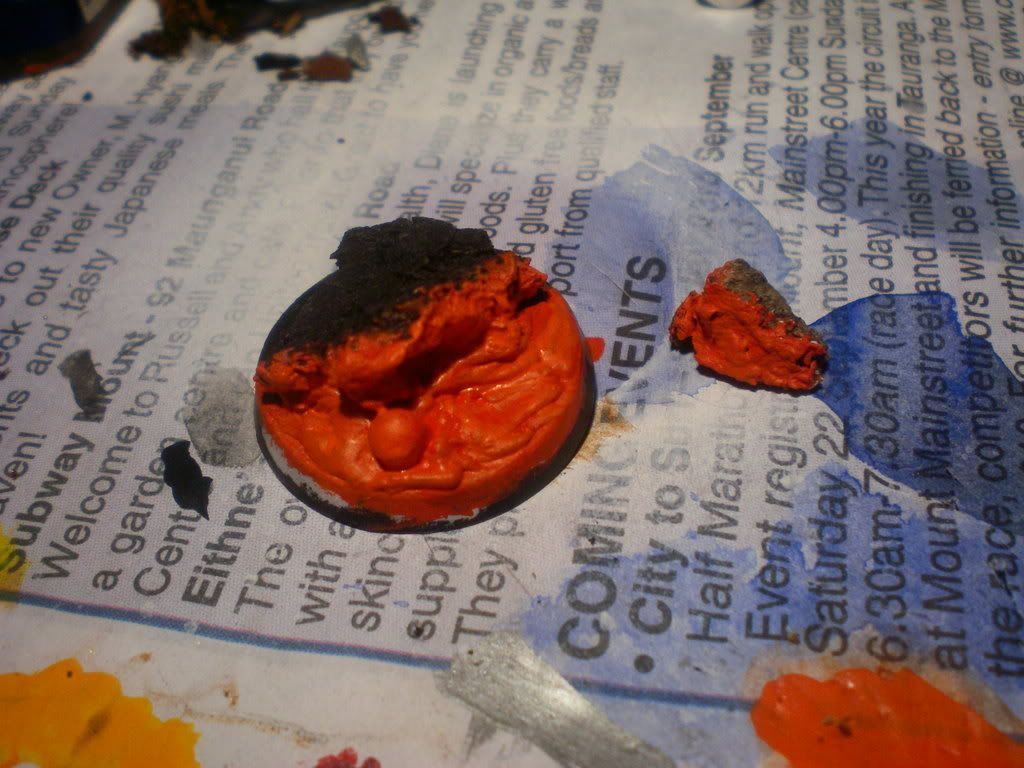
Stage 9: In this stage we really start to see the orange side of the lava come out. Apply a coat of fiery orange as you did in the last step. Remember to cover both pieces and the green stuff but without covering the earlier paint jobs. Repainting is a PAIN. Once again wait till it dries before proceeding.
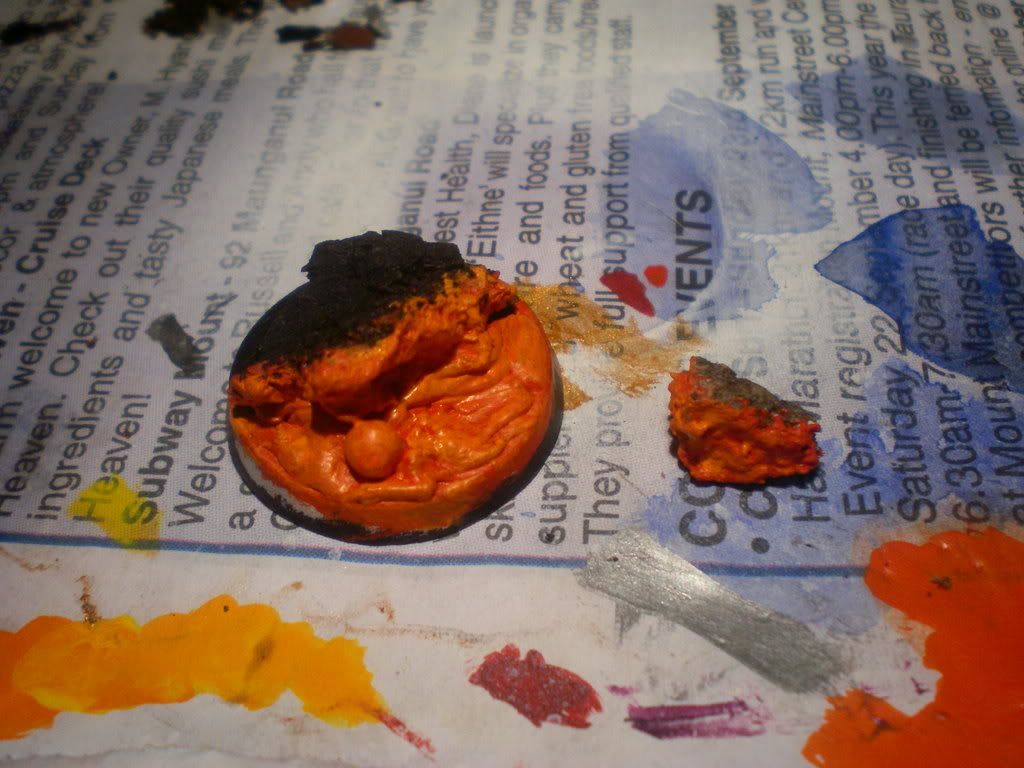
Stage 10:
Ok now mix that fiery orange 50.50 with Sunburst yellow. Apply again following earlier steps and it should look something like this:
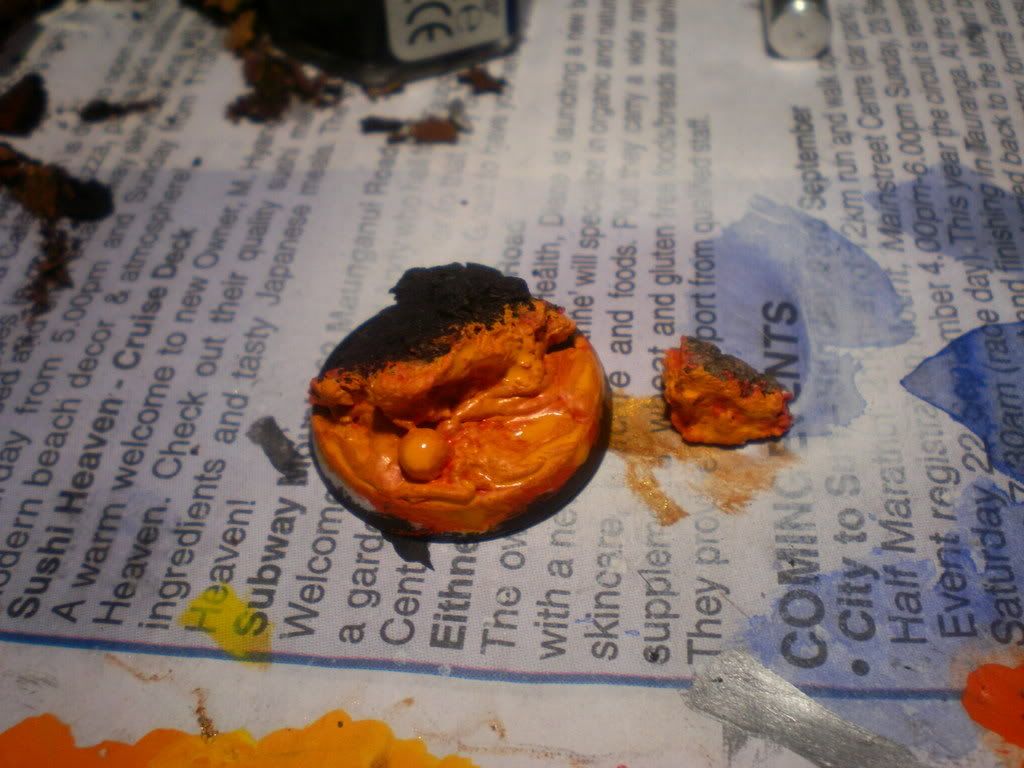
Stage 11:
Now we're talking! last lava paint so make this on count. Almost enough paint to not quite consider it dry brushing is all you'll need for this step as the yellow comes out quite strong. Remember people go right to the edges with this as well it looks quite stunning even if you go over the top of the barks as it looks like the lavas just recently overflowed.
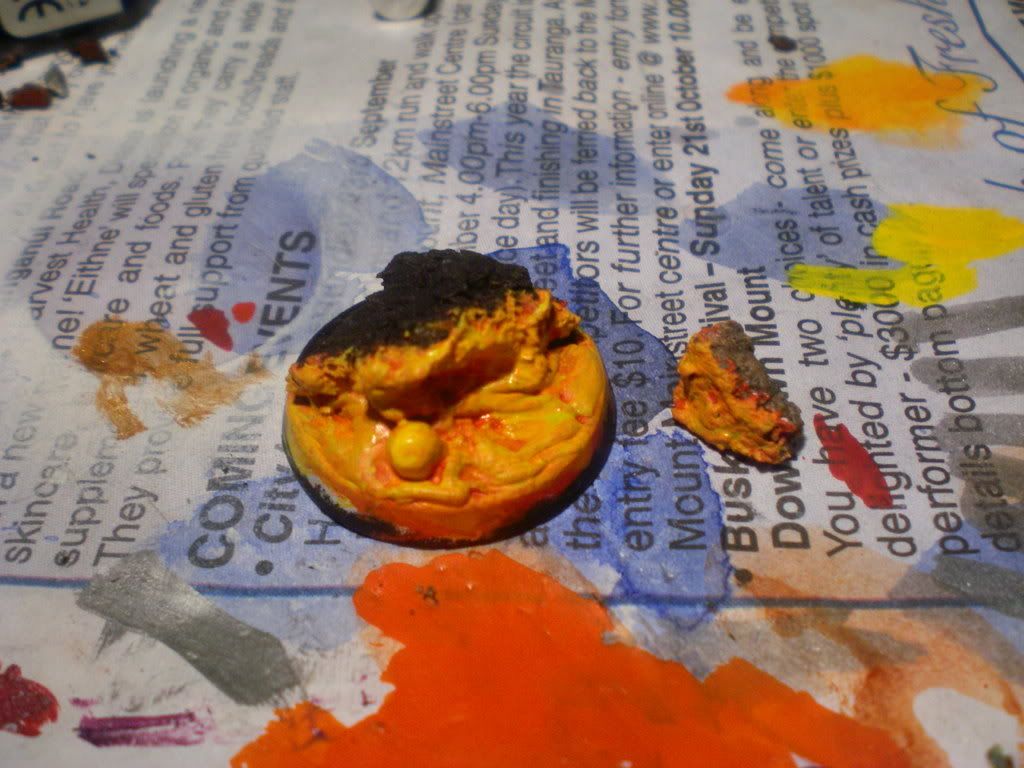
Stage 12:
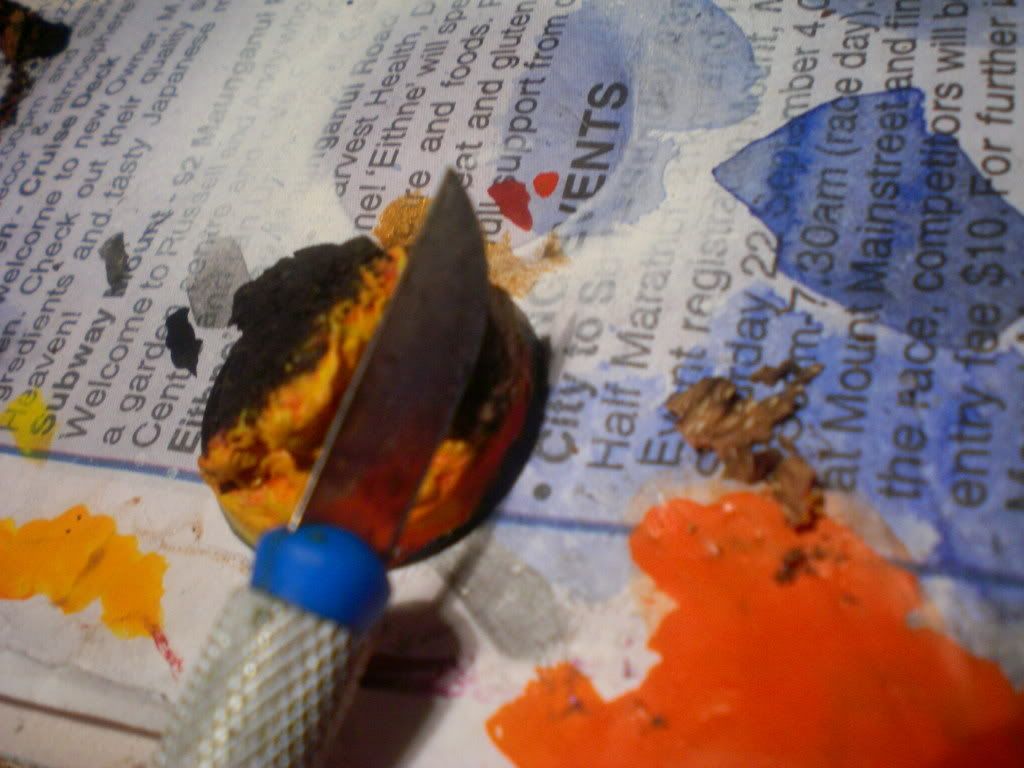
Now that that lava is hot and boiling its time to attach the secondary piece of bark to the base. Ensure your paint is dry before gluing to get a secure stick. once glued cut around the sides so no bark is hanging over the base i prefer it this way as you get a cleaner look to the rock and the whole model when its done but cutting the bark is entirely up to you. Once the glue has dried, proceed.
Stage 13:
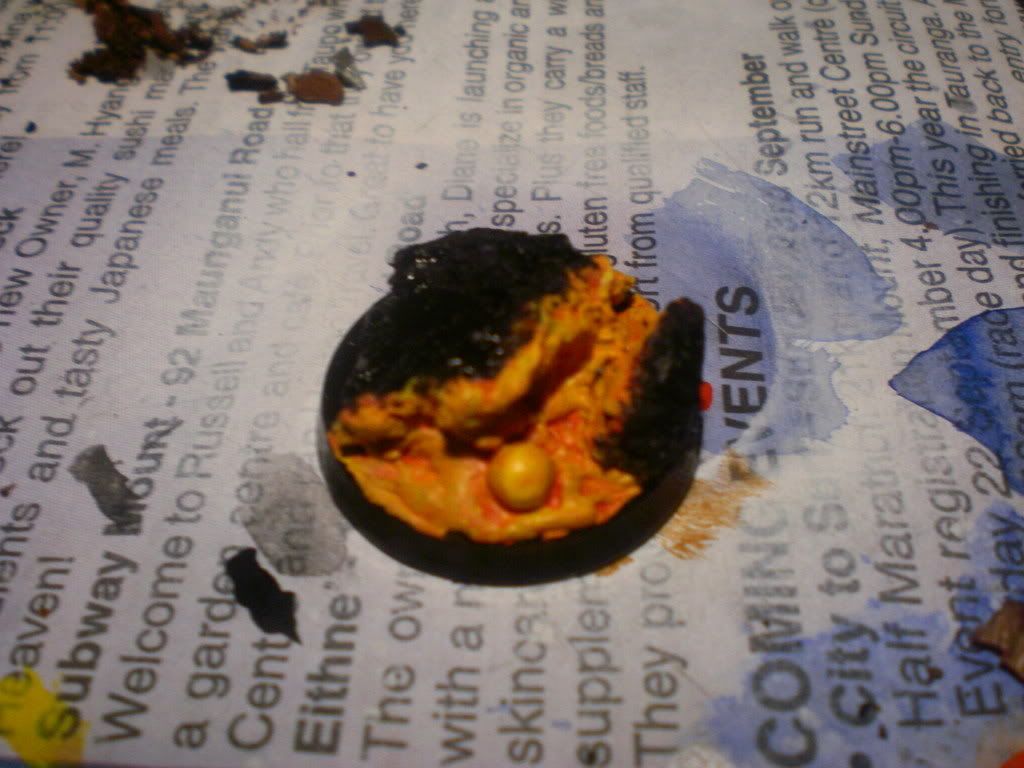
This i call the tidy-up stage where you'll be grabbing that paintbrush and chaos black again to paint whatever spills you had on the rim of the base and to make sure you didn't go too overboard with the lava. Wait till the paint dries and continue on. The picture below is a good representation of how it should look.
Stage 14:
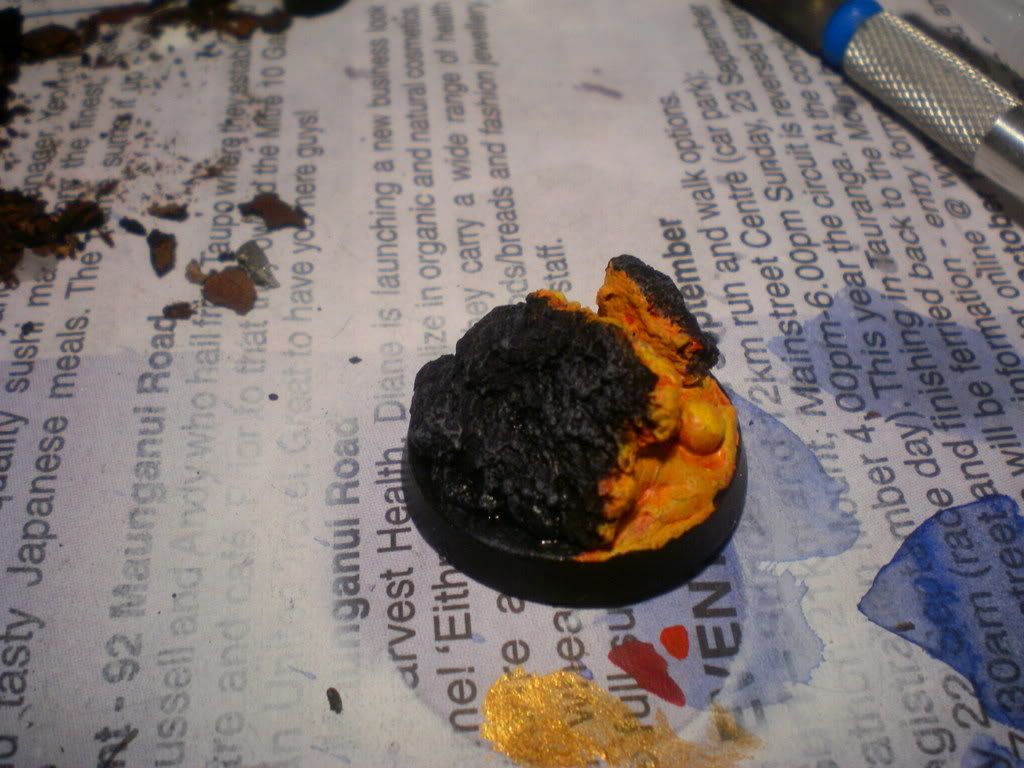
So close now! This will be the first highlight on the bark. Grab your codex Grey and wipe it so it seems like theres no paint left and simply dry brush the rock on both pieces. Be sure to get no paint on the lava because it doesn't make it look all to good, especially over that yellow
Stage 15:
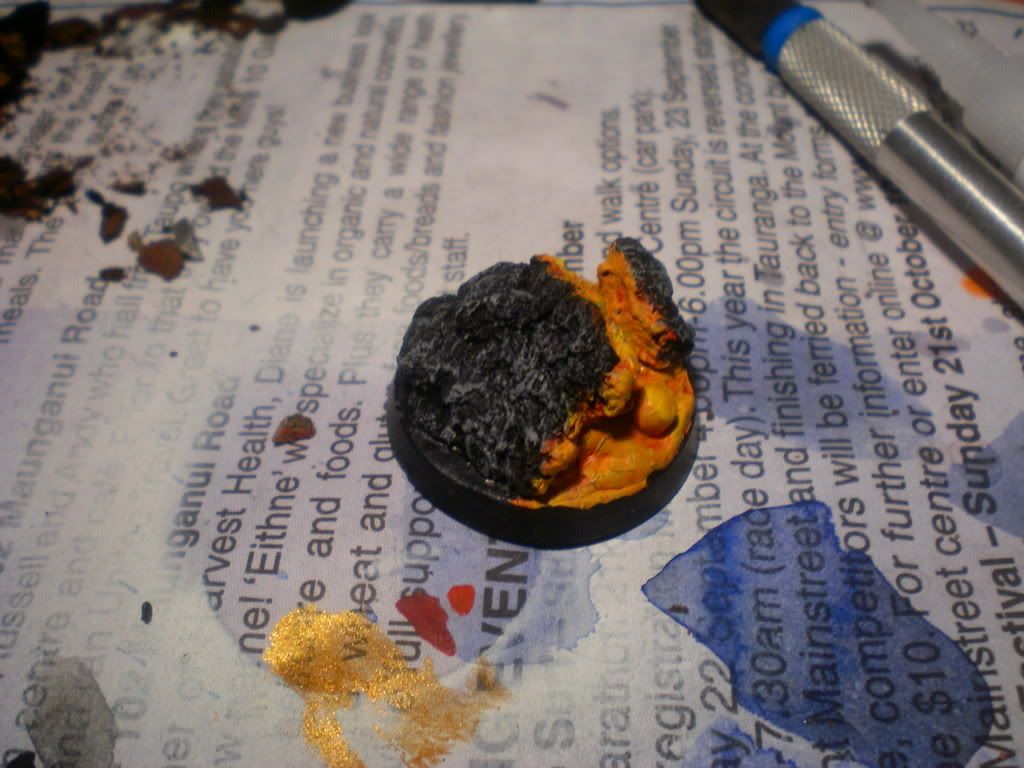
Final Stage! Now apply a final highlight over that last step with fortress Grey. This really bolds the bark and gives it that ashy kind of look. Heres what it should look like:
Well thats it guys. Hope that helped. Enjoy!
TNZ
First off you will need:
Water
Green Stuff
Bark
Crafting Knife
Paints:
Chaos Black
Skull White
Blood Red
Blazing Orange
Fiery Orange
Sunburst Yellow
Codex Grey
Fortress Grey.
Stage 1:
The first stage I guess would be picking the bark that you want for the terrain now most people are probably thinking this guy is nuts its just bark but below is a picture of just how much bark affects the final project but in also saying that differences in bark create a nice sense of randomness to your bases. Anyway cut the bark you choose so that it will fit nicely onto the base but not so high that your model will fall over. You'll also want to have a larger piece of bark(primary) and a considerably smaller piece (secondary) to make a cool volcanic effect.


Stage 2:
Quite simple, glue the primary piece on and try to cover the base slit so you cant see through it (alternatively you can green stuff it at the end of production) make sure this dries before proceeding.

Stage 3:
Now apply your green stuff around the primary bark. Include if you wish a small ball or an opening to create the effect of lava bubbles etc. Smooth around the edges and create slits/ crevices as shown to create the melting appearance. Handy tip: Keep the green stuff wet when applying and sculpting (it helps SO SO SO much).


Stage 4:
Now the green stuff doesn't necessarily have to be dry for this one just make sure you don't touch it with anything other then paint
 otherwise its a pain to re-sculpt. Grab that good old chaos black spray can if you have one (shake it good) otherwise normal paint is fine. Try not paint the green stuff though as we'll be painting that...

Stage 5:
White! Yes white. Water it down a bit though as GW paints are a tad bit thick. Apply only to the green stuff and the inner edge of the primary piece where the lava is just under (Also paint your secondary piece white but only where you think it will be above lava contact.) Should look something like this:

Stage 6:
Ok now for this stage we want to get Blood red painted onto the white, don't be afraid to go a little bit over the white as it creates a lighting effect from the lava. Wait till it dries before proceeding

Stage 7:
Now we want to paint over that red with a 50.50 mix of blood red and blazing orange, be sure to leave some red showing. Now as shown in the picture you wont notice too much of a difference but trust me its needed. Wait till it dries before proceeding

Stage 8:
This time you'll just need blazing orange. Apply evenly and carefully over the lava almost like dry brushing but without removing so much paint. Leave a little bit of the paint from the last step showing and continue to the next step once dry.

Stage 9: In this stage we really start to see the orange side of the lava come out. Apply a coat of fiery orange as you did in the last step. Remember to cover both pieces and the green stuff but without covering the earlier paint jobs. Repainting is a PAIN. Once again wait till it dries before proceeding.

Stage 10:
Ok now mix that fiery orange 50.50 with Sunburst yellow. Apply again following earlier steps and it should look something like this:

Stage 11:
Now we're talking! last lava paint so make this on count. Almost enough paint to not quite consider it dry brushing is all you'll need for this step as the yellow comes out quite strong. Remember people go right to the edges with this as well it looks quite stunning even if you go over the top of the barks as it looks like the lavas just recently overflowed.

Stage 12:
Now that that lava is hot and boiling its time to attach the secondary piece of bark to the base. Ensure your paint is dry before gluing to get a secure stick. once glued cut around the sides so no bark is hanging over the base i prefer it this way as you get a cleaner look to the rock and the whole model when its done but cutting the bark is entirely up to you. Once the glue has dried, proceed.

Stage 13:
This i call the tidy-up stage where you'll be grabbing that paintbrush and chaos black again to paint whatever spills you had on the rim of the base and to make sure you didn't go too overboard with the lava. Wait till the paint dries and continue on. The picture below is a good representation of how it should look.

Stage 14:
So close now! This will be the first highlight on the bark. Grab your codex Grey and wipe it so it seems like theres no paint left and simply dry brush the rock on both pieces. Be sure to get no paint on the lava because it doesn't make it look all to good, especially over that yellow


Stage 15:
Final Stage! Now apply a final highlight over that last step with fortress Grey. This really bolds the bark and gives it that ashy kind of look. Heres what it should look like:

Well thats it guys. Hope that helped. Enjoy!
TNZ


