|
|
Post by rpricew on Sept 11, 2012 14:48:17 GMT
I've heard many a marine cry nids are OP, just because they lose! Another great batrep, thanks for sharing. I noticed earlier you asked about raveners in cover. Just so you know they have been FAQed to still go at I1, in the rulebook FAQ. Thanks for the comment, Yeah.. I read the FAQ.  Hence the new list without Raveners. |
|
|
|
Post by rpricew on Sept 14, 2012 1:24:20 GMT
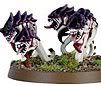
So I got two more games yesterday with the Dual Flyrant Hybrid list. Both games used the Tournament scenarios. First Game was against Space Wolves @ 2k Vanguard Strike/The Relic Space Wolves: Logan 6 LC Terminators in a Land Raider 5 Long Fangs with ML Vindicator 3 Ten Man Grey Hunter packs with 2 Flamers in Drop Pods Tyranids took first turn: This was a nasty battle in the middle with all units meeting there. One unit of Grey Hunters scattered and was misplaced. They were out of the game for most of the time. Deathleaper lowered the leadership of the Rune Priest stopping 1/2 of his powers. Flyrant takes Slay the Warlord with shooting the Rune Priest down. Deathleaper killed the Long Fangs. When the Terminators disembarked from the Land Raider they assaulted the Dakkafex, losing 2 on the charge. They killed it, then I multi-assaulted with 10 Super Termagants, Trygon, and the Doom. With a Flyrant lending support. Most of the Terminators died to shooting. Logan died from the Trygon. He conceded after 4 rounds. With only a handful of Grey Hunters left from the scattered pod. Tyranid win with a major victory (Primary, Secondary and Tertiary objectives) Game 2: Hammer & Anvil/Purge the Alien (secondary table quarters) Command squad with Astropath/Primaris Psyker, lascannon Sentinel with Plasma Cannon Leman Russ: 3 Heavy bolters, Demolisher cannon Leman Russ Squadron (3): Demolisher cannon/Lascannons Leman Russ: 3 heavy flamers, Demolisher cannon six 10 man Guard squads Snipers Vendetta with 3 TL Lascannons (veteran squad w/3 meltas) This game was very frustrating. I had some poor reserve rolls coming in piecemeal. I spawned termagants to claim objectives but managed to stay out of 24" range. One flyrant, trygon & doom came in turn 2. The Trygon mishapped and was put all the way back on my table edge (out of game). Doom ate 15 guardsman and died to a lone Lascannon shot after immobilizing the Command Chimera. His flyer came in turn two and grounded the tyrant scoring 2 wounds. I move up and the Ymgarls & Carnifex comes in. I assault a Leman Russ (with heavy flamers) and a guard squad killing the squad, but only scoring a hull point on the tank. Carnifex immobilizes one of the 3 squadron. 1st Flyrant dies. Turn 4, Deathleaper & Warlord Flyrant comes in. Deathleaper & the Ymgarls get fried by the Heavy flamers. Carnifex charges and destroys the Squadron of 3. Tervigon takes heavy wounds. I move up to take the center of the board. Veterans get out in my deployment zone. Kill unit of termagants holding my corner. Turn 5 - take 2 hull points off of the Vendetta, wipe out the veterans. Game ends with him killing the Wounded Tervigon. IG wins 8-5 (but we tied on Tournament Battle points due to the secondary objectives) Tyranid Deployment vs. IG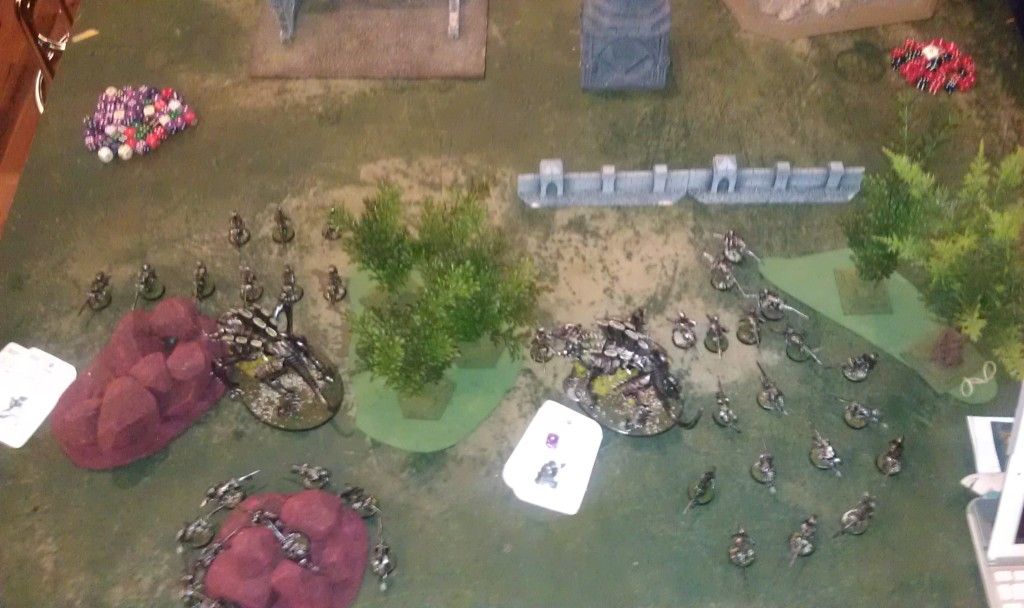 IG Deployment IG Deployment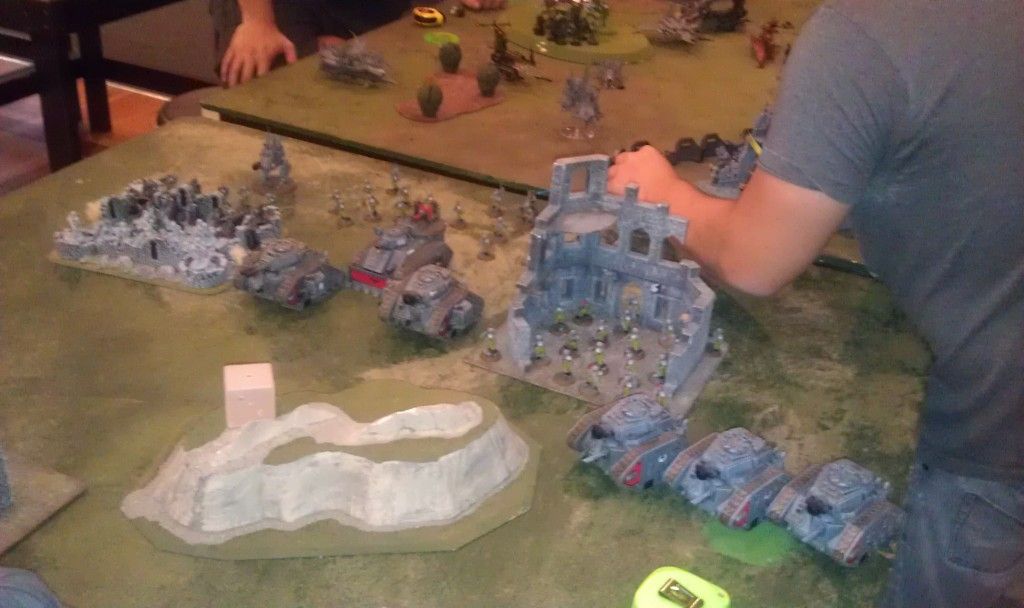 Thoughts on games: Thoughts on games: The Space Wolf game wasn't very fun. My opponent was trying to squeeze every angle out of me. I had to call him on many rules and it just took away from the experience. Best part of the game was almost tabling him. I learned that 2nd floor ruins don't bestow cover if you're exposed and Ymgarls can't appear on upper levels of ruins. IG game: Having the -1 to reserve rolls really hurt here. I also sacrificed the Deathleaper without thinking. This game wound up being a tie in Tournament terms, but it exposed the real weakness of the deep striking army. I can survive 1-2 mishaps or poor rolls, but when only 3 of 7 units come in on a 3+, then it's just bad. I was behind from the beginning and it took everything I had to survive and make a Tournament tie (even though I lost the Primary on Kill Points) Another note on Psychic Powers. Neither one of these games saw Iron Arm on any of my 4 Psykers. I got Life Leech EVERY TIME I ROLLED!!! Ugh!! Which I traded, but it seemed like my dice were loaded for old number 4... LOL It's been suggested to drop the Deathleaper & Doom to add a 2nd 8 man Ymgarl unit and to either upgrade the Trygon to a Prime, or swap the Trygon Prime for a 2nd Dakka Fex.What are your thoughts:  |
|
|
|
Post by Jabberwocky on Sept 14, 2012 12:50:38 GMT
I'd keep the list as is for now.
Why would you trade in life leech? Smite is no better and you run the risk of rolling it again! Best to keep it and just hope to not get hemorrhage.
|
|
|
|
Post by rpricew on Sept 14, 2012 14:28:57 GMT
I traded Life leech when it was appropriate. I usually didn't trade it if it came first. I did get Hemorrhage a couple of times and had to get rid of it also.
I'm probably going to keep the two Tyrants for now.
|
|
|
|
Post by roxor08 on Sept 15, 2012 15:07:23 GMT
Rprice, I support dropping the prime for another dakkafex. If you can score the points put him in a pod.
I think the deathleaper is a little out a place, so I also support a second squad of Ymargls, however I think the Doom works great for you and would suggest keeping him.
|
|
|
|
Post by rpricew on Sept 20, 2012 14:25:56 GMT
Another Batrep for the upcoming Tournament. This was against one of the regular Tournament players and was a very challenging match.
We used the Relic Tournament scenario as before, where the secondary objectives were to eliminate your opponent's force organization slots for 2 points each.
Running the Dual Flyrant list from last week...
2000pts vs. The Eldar - The Relic/Vanguard Strike
Eldar:
Edrad (codex powers)
Farseer (Divination)
10 Wraithguard
2 units of 3 War Walkers (scatter lasers)
2 Forgeworld Hornets (Fast, 48" Str8 AP3 shooters similiar to Vipers)
Fire Prism
2 units of 7 Dire Avengers in Wave Serpents
Aegis Defense line w/ Icarus LasCannon
I won the roll and decided to go first. I rolled on Biomancy and received Endurance on 3 of 4 MCs but I also got Life Leech (again on 3 of them too) The other Tervigon rolled Hemorrhage & Warp Speed (traded Hemorrhage for Smite). Not a single Iron Arm or Enfeeble. (3 games running now)
Deployed both Tervigons behind the only LOS blocking piece of terrain we had (which I put in my deployment zone near the middle). Devilgants on the left flank, Termagants in the ruins with Tervigons. He deployed almost all the way back in the corner with Wraithguard out front and Eldrad/Farseer attached. Farseer was manning the LasCannon. War Walkers and Fire Prism in the back, with his Troops & Hornets in reserves. Hornets were outflanking.
Deathleaper was after Eldrad, but only lowered his Leadership by 1.
Turn 1:
He did not try to sieze first, and I rolled endurance on one of my Tervigons (other had useless powers at the moment). I spawned two units of Termagants and bunkered down.
Eldar shooting killed one unit of Spawned Termagants, but the Tervigons were out of sight and took no wounds. Giving him "FIRST BLOOD"
Turn 2:
All of my reserves come in!!!! I warned him going into the game that my list was affectionately called "Alpha Strike". He hasn't played against Tyranids in 6th at all and haven't faced them in a long time. The Carnifex and Trygon landed behind the War Walkers behind the Aegis. I was using his troops to limit the scatter (but the board was only 7" away) Doom landed out front near the Wraithguard. Flyrants Swooped on and the Deathleaper appeared standing next to the Aegis. The Ymgarls come out of a nearby ruin and head for the Wraithguard.
Deathleaper had the lucky roll of the day!!! The Icarus LasCannon get's to intercept one unit arriving from Reserves at the end of my Movement Phase. Well Deathleaper was hiding with his handy dandy 2+ cover save, but the Wraithguard unit, with the Farseer manning the Icarus Lascannon, had the Psychic power that ignores cover. My opponent chooses to shoot at the Deathleaper, ignoring his cover save. Roll to hit, miss, Fortune = Hit, rolls a 1 to wound. (hears sad trombone music) Woo Hoo! Deathleaper lives to fight another day!!!
This was my first experience with Fortuned Wraithguard (OMG that is a durable unit) Fortune allowed them to re-roll 3s which is a 90% save. Needless to say, they withstood most of my shooting, killed the Ymgarls on his turn of assault, Killed the Carnifex before it got to swing in combat on turn 3, and just took an amazing amount of work to kill.
OTOH, I destroyed almost all of his War Walkers on the turn I arrived, leaving one stunned. The Doom only gained one wound for the whole game with the Wraithguard rolling below 10 on 3D6 for 4 Turns! That's 8 rolls!! Of course, my Psychic powers also seemed to be incredibly lucky, with Runes only denying me twice.
Eldar Turn 2: SITW blocks the Farseer (Go DOOM!) But Eldrad still gets Fortune and Doom off at his lowered leadership. Ymgarls are finished on his phase, and only one Wave Serpent comes in. Very uneventful turn for the Eldar.
Tyrand Turn 3: Tervigons move forward to claim the Relic in the center, spawning Termagants and one burning out. (I ran them as a pair side by side with Tergmagants all around). I assaulted the Wraithguard with Both Tyrants, Trygon, and Carnifex (who died before he could swing).
Lesson Learned: If your enemy has a model that gives him those silly 3+ Invulnerable saves like Eldrad does, single him out with a Challenge. This is what kept the combat going for 6 rounds. Eldrad took all of the MC wounds on himself re-rolling those 3s, which meant that Wraithguard weren't dying. If I had singled him out with the NON-Warlord Tyrant, then I would have made quick work of the Wraithguard/Farseer/Warlock and even if Eldrad killed the Flyrant, he would have been wounded. But I wouldn't have lost MY Warlord in the process. Also, I forgot to use Smash, thereby potentially Instant Killing him. The Deathleaper assaulted the Fire Prism penetrating it twice, but failing to do more than stunning it. It flew away to go after the Tervigons.
Eldar turn 3: One Hornet and the other Wave Serpent come in. He heads for my Tervigons in the middle. Shoots a couple of wound off the one holding the relic. I spawn some Termagants (burning out 2nd one) and assault one of the Wave Serpents with them. I cause 2 Hull points but no further damage. Devilgants move up into range, but Hornets are front armor 11, so no effect. Remaining War Walker assaults the Doom, who failed to Cataclysm, due to Runes, and is only str 3 and can't hurt it. They stand there headbutting each other for 2 turns with nothing happening.
Tyranid Turn 4: Deathleaper challenges the Farseer (ripping him to shreds) The combat starts to dwindle and finally on his turn I finish off the unit, having only taken two wounds on each Tyrant. Amazingly I got Endurance off on both of them every round. The unit of Wraithguard finally crumbled when Eldrad, seeing the Deathleaper rip apart the Farseer in front of him, lost his focus and failed to grant Fortune on himself and his unit. The SITW along with his fear was just too much!
SLAY THE WARLORD goes to the Tyranids. We also had LINEBREAKER because the Spore Pods were in his deployment zone.
Eldar Turn 4: The other Hornet comes in and the Tervigon holding the Relic dies in the cross fire. And in splendid fashion he takes 2.5 units of Termgants with him. (my opponent had never seen a Tervigon explode and was overjoyed with the carnage)
Tyranid Turn 5:
The other Tervigon picks up the Relic, both Flyrants shoot off after the Hornets, the Devilgants shoot down one unit of Dire Avengers and they run off the board. The Tervigon with the Relic assaults and wrecks the wounded Wave Serpent. One Hornet goes down to Flyrant shooting and the other is stunned with only one hull point left. My remaining Tervigon has the Relic and all 6 wounds where my opponent only has one Hornet, the Fire Prism, and one Wave Serpent with 7 Dire Avengers who just disembarked the previous turn to pick up the Relic. The Trygon runs over and helps the Doom handle the last War Walker.
Eldar Turn 5: He attempts to bring down the Tervigon with everything left, but Endurance saves all but 2 wounds.
We roll and the game would continue, but we had reached the time limit. My opponent concedes that the Devilgants would have murdered the remaining Dire Avengers, plus the Tervigon would have assulted and mopped up any survivors. The Flyrant would have destroyed the remaining Hornet which was his best chance to kill the Tervigon.
TYRANIDS WIN
Relic = 3 points
Slay the Warlord = 1 point
Line Breaker = 1 point
Killed all HQs = 2 points
Killed all Elites (He didn't have any, so I get these points) = 2 points
9 points total
Eldar:
First Blood = 1 point
Killed all FA (I didn't have any, so he gets these points) = 2 points
3 points total
Major Victory (Not Triumph, which would have required me to take First Blood.
|
|
|
|
Post by firedragon on Sept 22, 2012 10:03:20 GMT
Nice battle report, glad to see that the alpha strike pays off. Im using a similar idea in my own list at 1750.
Good job.
|
|
|
|
Post by rpricew on Sept 22, 2012 14:16:22 GMT
More Tournament practice - Hammer & Anvil/Purge the Alien This game was against a non-Venom list, which unfortunately didn't help me prepare for all of the Venoms coming up Sunday However my opponent was very cool and we had a great game. Plus he brought lots of poison, Splinter Cannons, and Lances to try and ruin my day! Which is exactly what I wanted. 2000 points Vs. Dark Eldar Archon 5+/2++ instant death weapon 5 Incubi Raider 7 Wyches Webway Portal 10 Wyches Raider 10 Warriors (Blaster) w/ Raider (Splinter Racks) 10 Warriors (Blaster) w/ Raider 10 Warriors (Blaster) on foot 5 Scourges with blasters 6 Jetbikes w/ Caltrops, blasters 6 Jetbikes w/ Catlrops, blasters 2 Ravagers Talos Pain Engine All vehicles had Night Shields (Which I kept forgetting about, this effectively lowered my range to 36" threat range with the Tyrants. Thankfully my opponent, would remind me during the movement phase so I could compensate. My list was the 2K Dual Flyrant Alpha Strike V4 from the past few games. Tyranid Warlord gets to re-roll outflanking DE Warlord (Archon) is scoring Deployment: Dark Eldar takes the first turn deploying everything about 8" from his table edge. I purposefully pick terrain that doesn't block LOS, since it's a good chance in the tournament that there will be many tables like that. The Ravagers are in the middle, with Wyches & Incubi coming up the near side and the Bikes, Scourges and other Raider/Warriors moving up the far side. The Webway Wyches are waiting in reserves, and the remaining Warriors are sitting in the middle covering a large piece of area terrain. Tyranids deploy all the way in my near corner behind a Mysterious Forest. Tervigons side by side. Everything else went into reserves. I placed a large area terrain ruin in the middle of my deployment zone to hide the Devilgants in, but they were out of LOS (almost) and out of Synapse so they could go to ground if needed. I was able to make sure that even if he moves up I would still be out of 36" range. DE Turn 1: Fail to Sieze initiative Everything moves forward and one Ravager in the middle shoots the Devilgants (only thing in range), they GTG and lose none. Tyranids Turn 1: This time I kept the codex powers on the Tervigons to help shrug off Lance/Blaster fire. This was a good idea. I cast FNP on both Tervigons and spawned Termagants to help create buffer zones and spread out to block the Turbo Boosting Jetbikes. DE Turn 2: He holds the Webway portal, keeping the Wyches in Reserve, and moves up again. The Jetbikes were just out of Turbo Boosting range since they couldn't clear the spread out Termagants in the back. (plan worked) I take one wound from Lances this turn passing 3 of 4 FNP rolls. Tyranids Turn 2: Again all of my reserves come in on a 2+. This was my chance to make an impact. Ymgarls come out of Mysterious terrain but suffer no damage, Devilfex drops behind a Raider with warriors, Trygon goes nearby into Area Terrain. Doom drops into Terrain (after scatter) but still has 2 Bike units and the Warrior unit on the hill. Deathleaper hides in Ruins behind a spore pod, but near his backfield units. Both Flyrants come on Swooping up the near edge. I blast the Raider holding the Wyches with one Flyrant, wrecking it; TYRANIDS FIRST BLOOD but the other Flyrant fails to do anything to the Incubi transport. Devilfex explodes the Raider with Warriors killing 8 in the explosion. Trygon shoots but doesn't wound. Doom fails to gain a single wound from any of the 3 DE units. Doom then retaliate with Cataclysm which is Str 4, but can do damage to DE and they roll a 6 Denying the Witch. BOO!!! Deathleaper just hides. Spore pods attack nearby units but cause no wounds. Tervigons give themselves FNP and one burns out when spawning. I spread out again in the Backfield but I start moving toward the center with everything to start and control the board. Ymgarls are the ultimate fail as they fail a 6" charge to the Ravager with re-rolls and are left hanging out in the open. DE Turn 3: Still no Wyches from the Webway. He forgets the Doom is there, and just shuffles around...preparing to line up a nasty Turbo Boost over my Devilgants. He moves away from the Ymgarls with the Ravager and brings the Incubi closer to the middle of the board going flat out to prepare them for disembarking next turn. Here is where the Doom makes his money! He eats 9 of the 12 jetbikes and goes up to Str 10. He also eats a couple of Warriors in the nearby Area Terrain. My opponent freaks out and starts turning all of his ships around to try and gun down the Doom. Since he was kinda new, we stopped him and told him to just start with his Dark Lance from a Raider. Sure enough, One Shot - One Kill... Bye Bye Doom! The remaining 3 Jetbikes actually find a place to Turbo Boost in their smaller numbers killing 4 Termagants. Shooting takes a couple of wounds off of a Flyrant but I pass my Grounding Test. 4 Ymgarls die to shooting. Wyches shoot and kill one Termagant out of a unit that's teasing near them on my board edge. Tyranids Turn 3: Both Flyrants move toward the middle of the board to get into range with Night Shields, one targets and destroys the Ravager the Ymgarls failed to reach. The other shoots and kills all but 4 of the Wyches. Ymgarls move behind a hill hiding, the Devilfex wipes out the unit of Warriors on the Area Terrain. Deathleaper runs out and assaults the 2 Warriors left in the crater from the Devilfex's first round of shooting. Side note: This combat with the Deathleaper was the epitome of ultimate fail. On 5 attacks on the charge, I rolled four 1s. The DE squad leader had a weapon that got crazy attacks and he only caused one wound in the first round. This combat lasted until turn 5 where the DL finally killed the last guy. DL rolled to hit and only connected 1 time every round, and he never rolled a single Rend. My opponent was equally frustrated since he needed 5s to hit. So to recap, 4 hits every round and I would roll 2s or less on 3 of them each time. My opponent never rolled above a 4 for the remainder of the combat. LOL Trygon moves and runs forward. Tervigons cast FNP on themselves. One assaults and kills the 3 remaining Jetbikes. DE Turn 4: He shoots down the Warlord Flyrant, Assaults the Termagants with his Wyches. Disembarks the Incubi and assaults and kills a unit of Termagants. Remaining Ravager takes up position and starts taking wounds off of my Tervigons. He takes a couple of wounds off my remaining Flyrant but I pass my Grounding Test. Talos moves up and kills 3 Devilgants. Wyches in combat with Termagants kills two on both side. Deathleaper continues his Fail. Tyranid Turn 4: Shooting at the Ravager from the remaining Flyrant falls short, due to excellent cover save rolling on his part. I pull back my Termagants and bubble wrap my Tervigons from the Incubi. Here is where the game took a turn for the worse for him. The Devilgants unload on the Archon unit & murder them. He fails the first save on the 2+ thing and then they just start dropping like flies. 7 Devilgants killed the Archon and 2 Incubi. The Tervigons kill 2 more with Cluster Spines, and then the other Termagants kill another one. He fails his leadership and runs away. Trygon and Devilfex move and the Devilfex shoots and kills the Scourges hiding in terrain. The Trygon Rages and runs. Wyches in combat with the Termagants finally succumb to their wounds. DE Turn 5: He forgets to bring in the Wyches in reserves. I don't know if they should have come in turn 4 or what... The Raider full of Warriors shoot, ground and kill the Flyrant in one go. Causing two wounds in the air and him dying to the Grounding Test. Ravager takes a wound off of the Tervigon taking him down to 2. I pass FNP on the other wound. Talos shoots the Devilgants killing 5. Then rolls 11 on assault into terrain. He whiffs on his attacks and the Poisoned Devilgants get counterattack. Hitting 4 times, wounding 3 times and he fails 2 saves. Devilgants win by 2, he fails his leadership and the Devilgants Sweeping advance. BOOM! Don't mess with the Devilgants!!! Tyranid Turn 5: 3 minutes to GO on time. Cast FNP on the Tervigons, move gants into terrain. Move and Run the Devilfex & Trygon. Deathleaper finally kills the remaining Warrior for the KP. Game Over (we rolled a 6 to continue, which would have been bad for me, but it was time per the tournament rules) TYRANIDS WIN!!! 9 KP to 4 KP First Blood: Tyranids Slay The Warlord: Both Line Breaker: Tyranids Final Score 12-5 |
|
|
|
Post by DukeMantis on Sept 22, 2012 14:49:28 GMT
Brilliant batreps i love your army  |
|
|
|
Post by rpricew on Sept 24, 2012 3:01:34 GMT
Tournament Results: Game 1 Dual Flyrant List V4 Scenario #1 Dawn of War/5 Mysterious Objectives 2000 points Grey Knights Librarian w/ 2 Divination Powers 10 Terminators/ 2 Psycannons/ 6 Halberds 2 Storm Ravens/ Psybolt Ammo/Multi-Meltas 2 Five man Strike Squads Mordrak w/ 3 Ghost Knights Dreadknight w/ Sword & Heavy Incinerator He won the roll off and decided to go first. No night fighting. Deathleaper chose to go after the Librarian, but only lowered leadership by 1. He deployed the 10 Terminators & Librarian on his side with the Dreadknight on my right. I deployed behind LOS blocking terrain with the Tervigons. I placed 2 objectives on my side, one in the middle and two near his side. Grey Knights turn 1: He moves up and Perils the Librarian. The Dreadknight teleports and flames my regular Termagant unit killing a couple. Mordrak arrives via Deep Strike near my side and shoots a couple of Termagants out of the same squad. Tyranids Turn 1: I roll endurance on my Tervigons and spawn about 6 Termagants on the one on the left, burning out. The one on the right spawns 13 and they assault the Dreadknight. Grey Knights Turn 2: Both Storm Ravens come in from Reserve and kill the Tervigon on the right. Terminators shoot and kill a spawned Termagant unit taking FIRST BLOOD He blows up and kills most of the remaining unit on the objective and half of the unit assaulting the Dreadknight. Tyranids Turn 2: Deathleaper & Trygon stay in reserve. Flyrants come on and destroy one of the Storm Ravens. Carnifex shoots but fails to wound Mordrak's unit who goes to ground. Devilgants hide behind terrain out of sight and claim objective on the left. Ymgarls come out of terrain, but the crashing Storm Raven kills 3. They assault the Dreadknight but fail to wound it. It destroys them in return. Doom fails to cause any wounds. Grey Knights Turn 3: Librarian unit moves up through terrain shooting at Fwd termagants. Mordrak is pinned still. Storm Raven shoots at Tervigon, but fails to wound it (Iron Arm Toughness 9). Dreadknight Smashes the Doom in the Face and kills him. Tyranid Turn 3: Flyrant blows up other Storm Raven killing all inside. Other Flyrant shoots down the Dreadknight. Remaining Tervigon spawns 3 and burns out on triple 1s!!! LOL. Trygon & Deathleaper arrive from Reserves. Trygon takes the backfield to support the Tervigon and the Deathleaper takes shelter behind LOS blocking cover to stay "After the Librarian" The Carnifex shoots, assaults & get's Force Weaponed by the Halberd in Mordrak's unit. Rolled a 2,2,3 under SITW to use the Force Weapon. Grey Knights Turn 4: Librarian Perils of the Warp and dies. SLAY THE WARLORD Terminators move up and shoot Mycetic Spore; killing it. Trygon, Tervigon & Hive Tyrant shoot & Assault Mordrak's unit and get them off of the objective. Trygon Smashes for ID. Deathleaper goes back into reserves. **Bonehead move of the Game: I decide that the Termintor unit is just too juicy to leave alone in the middle of the board (even though they have done almost NOTHING the whole game). So I move my Devilgants out from behind the hill and on top of it. I shoot at them and kill one, and they repay my kindness by wiping my Devilgants off the board. This gives up my 2nd objective that I was holding costing me 3 VPs. Grey Knights Turn 5: Terminators move forward and run to try and get Linebreaker. They hold one objective in the middle of the board. Tyranid Turn 5: Both Flyrants shoot and kill 2 Terminators, but fail to move them off the middle objective. Tervigon moves onto the objective in my backfield. Deathleaper arrives from Reserves in his deployment zone and takes LINEBREAKER. Game Ends (Pyrric Victory) Tyranids: Objectives: 3 VP Linebreaker: 1 VP Slay The Warlord: 1 VP Grey Knights: Objectives: 3 VP First Blood: 1 VP If I would have kept the Devilgants hidden, then I would have had two objectives giving me a larger margin of victory and I would have done better in the tournament. My Army 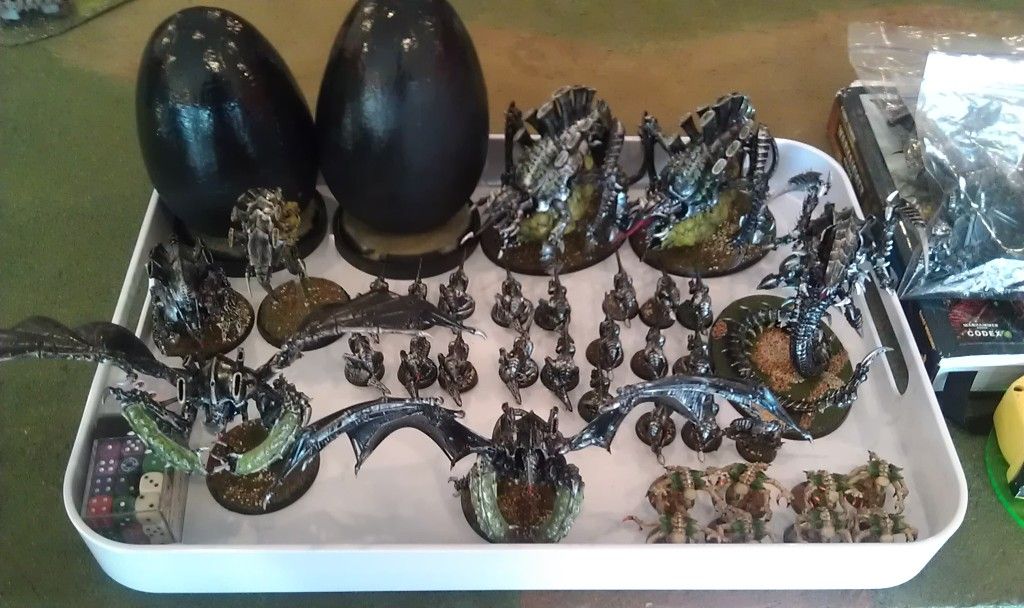 Grey Knights Deployment 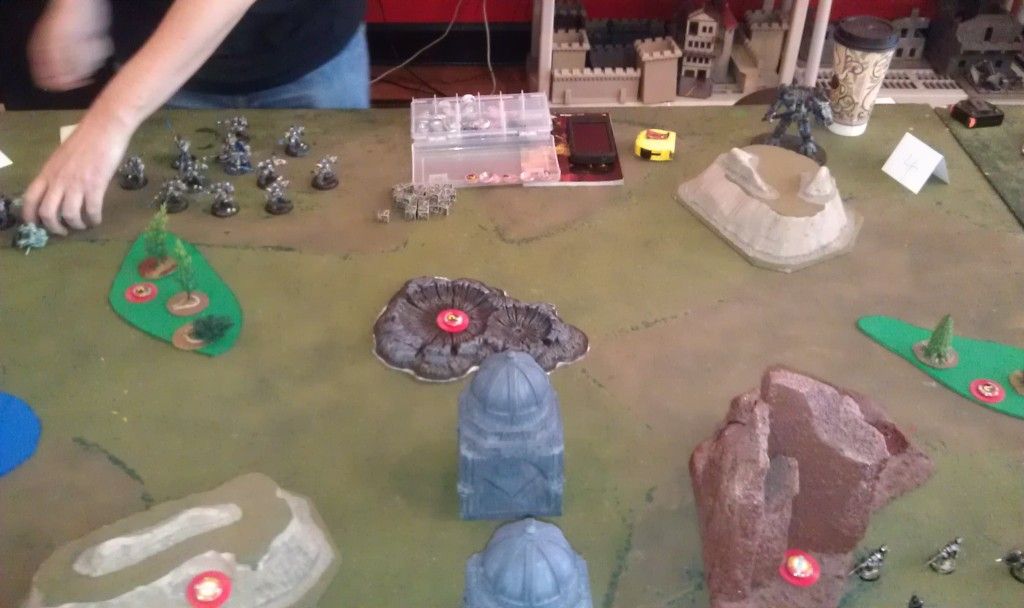 The Main objective that most of the fighting was over on my side of the board. This was at deployment. Ymgarls were hiding in the rocks since I knew Mordrak was coming. This is the Tervigon that was shot down by the Storm Ravens. 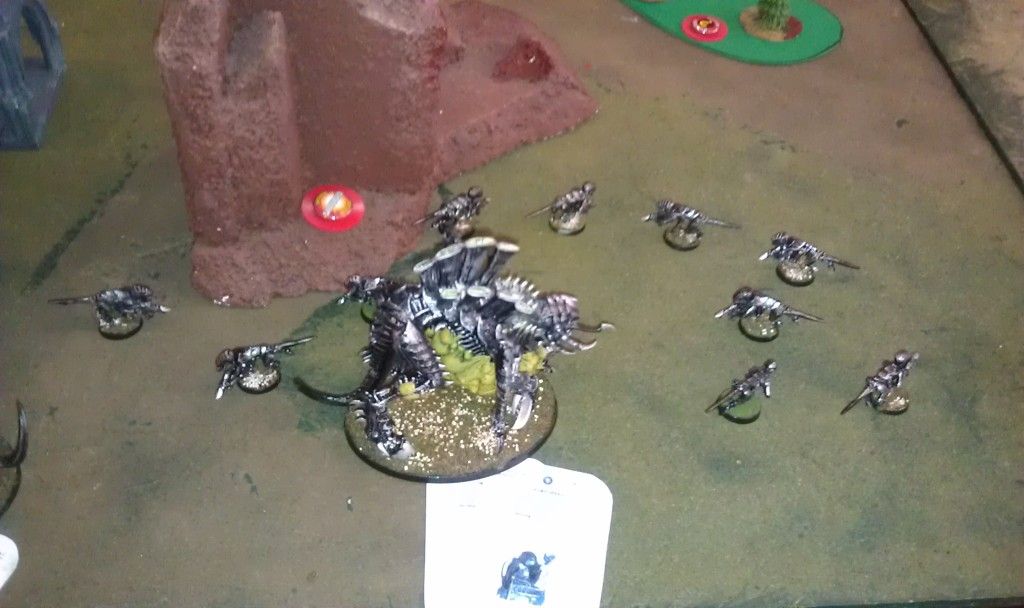 Here come the Storm Ravens Turn 2. I loaned him my base to represent the Storm Raven sitting on the Rocky Terrain. (Wobbly Model Syndrome) 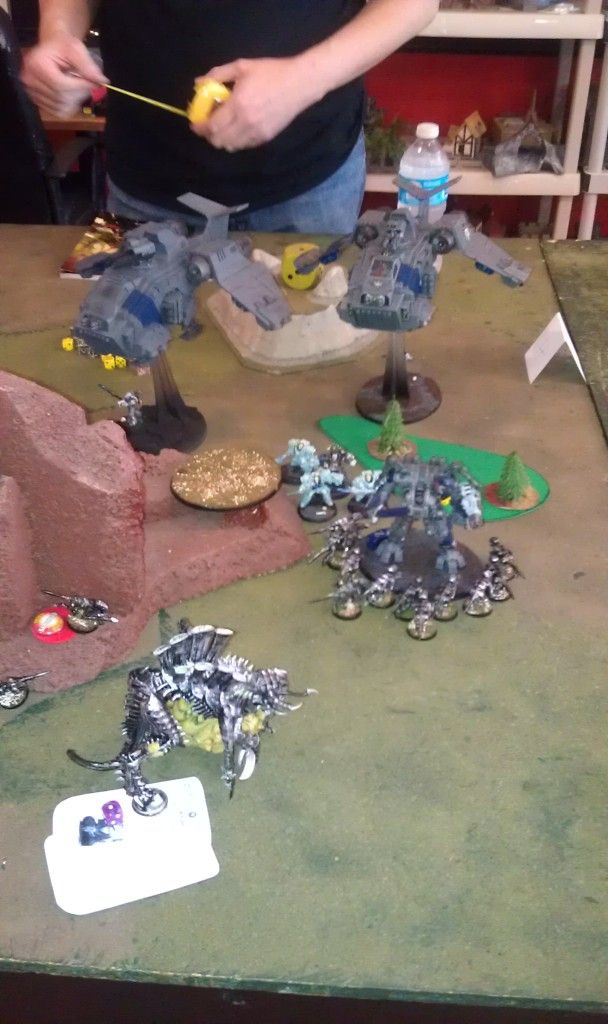 I will get round 2 & 3 up tomorrow I hope. |
|
|
|
Post by N.I.B. on Sept 24, 2012 8:58:45 GMT
Great reports, keep it up! Love the pics, would like some higher quality close-ups on your models. Really like the Doom (is it a vanilla Malanthrope?).
Did you remember to roll for Spirit Leech on the Dreadknight in Grey Knight turn 3 in this game?
|
|
|
|
Post by rpricew on Sept 24, 2012 20:08:22 GMT
Great reports, keep it up! Love the pics, would like some higher quality close-ups on your models. Really like the Doom (is it a vanilla Malanthrope?). Did you remember to roll for Spirit Leech on the Dreadknight in Grey Knight turn 3 in this game? The Doom is a vanilla Malanthrope. I did roll for Spirit Leech and he would have taken 2 wounds from the Dread, but he made both 5+ Invulnerables. Mordrak went to ground in Turn 2 taking 2+ cover saves from Spirit Leech. |
|
|
|
Post by rpricew on Sept 24, 2012 23:50:37 GMT
Tournament Game #2: Vanguard Strike Primary Objective: The Relic Secondary Objective: Attrition (eliminate your enemy FOC slots) Vs. Grey Knights (again) HQ: Inquisitor Coteaz Jokero, 3 Plasma Servitors, 7 Acolytes 6 Strike Squad w/Razorback (TL Assault Cannon) Psybolt 6 Strike Squad w/Razorback (TL Assault Cannon) Psybolt 6 Strike Squad w/Razorback (TL Assault Cannon) Psybolt Razorback (TL Assault Cannon) Psybolt Razorback (TL Assault Cannon) Psybolt 6 Henchman w/Flamer 6 Henchman w/Flamer Storm Raven w/Psybolt Storm Raven w/Psybolt Psyfle Dread Psyfle Dread Aegis Defense Line w/ Lascannon I won the roll to go first. I chose to deploy, since my opponent was bringing 2 Storm Ravens and I wanted the chance to get Endurance/Catalyst off. I deployed behind terrain with the Devilgants behind a low wall. The Termagants in a ruin on 2nd Floor near my two Tervigons. He deployed in his corner 6" from table corner with Aegis Defense surrounding his Coteaz Blob and the 2 Psyfle dreads. 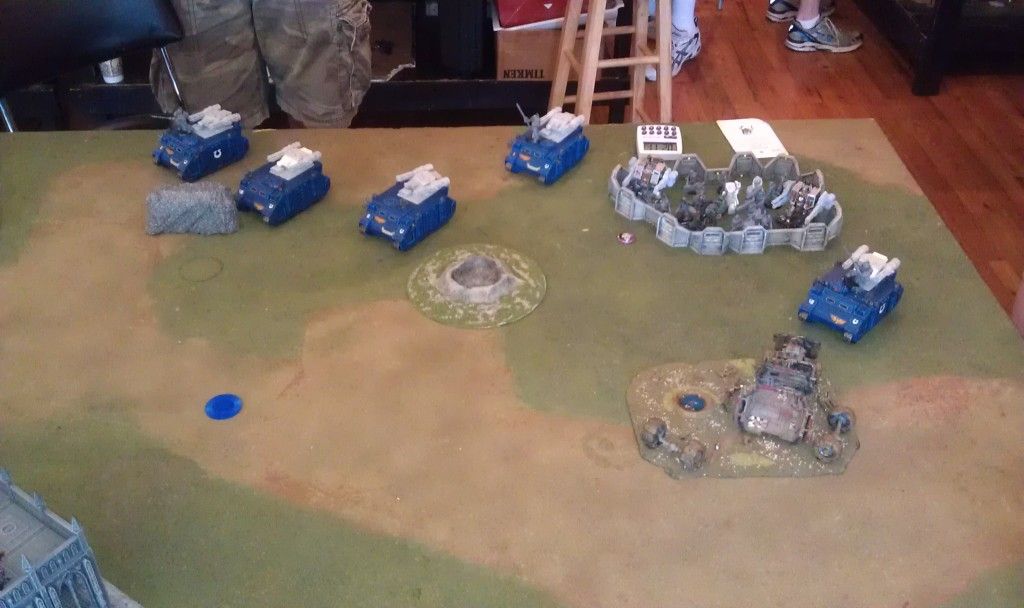 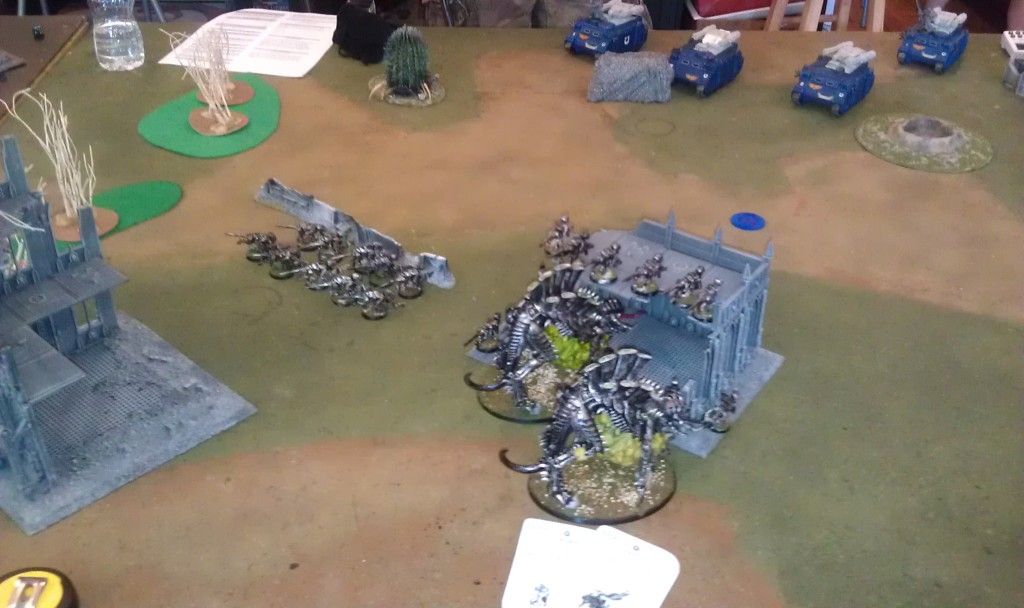 Coteaz steals initiative!!! Boo! Deathleaper chooses to go after Coteaz, but only lowers his leadership to 9. Grey Knights Turn 1: Coteaz got Ignore cover and re-roll to hit as his two Psychic Powers and even with Deathleaper lowering his leadership he got both powers every turn. He opens up with moving, shooting at the two Tervigons taking 2 wounds off of one Tervigon. He cast Sanctuary on his 3 Strike Squads spreading them out to maximum distance. He disembarks the Strike Squad on my left and shoots at Devilgants killing 2. Tyranid Turn 1: I move back a little to get out of range of some of his shooting. One Tervigon spawns 6 Termagants and burns out. The other makes 12 and they move up into the Ruins. The Devilgants shoot and kill one Grey Knight that had gotten out of their Razorback to shoot. I cast Endurance on the wounded Tervigon and Catalyst on the unwounded one. Grey Knights Turn 2: Both Storm Ravens come in and with help from the rest of the army, they kill the unwounded Tervigon (which was the one that hadn't burned out with spawning). The Brood Progenitor burns about 8 Termagants from one unit and one from another. He cast Sanctuary again on all of his Strike Squads, but rolled double 6's on the middle unit, killing the Justicar. He spread out again to cover the Aegis defense line with the Strike Squad on my right. He disembarks the troops on my right and spreads them out between the Area Terrain and the Aegis Defense Line to block the potential Ymgarls from coming out. During the Zooming, one of the Storm Ravens deepstruck it's payload (6 Warrior Acolytes w/Flamer) and they kill a couple of Termagants. Tyranids Turn 2: All of my reserves come in. Because of Sanctuary, I couldn't land near Coteaz, so I landed the Pods in the center near his Razorbacks. Dropping the Doom and Carnifex close by. The Flyrants Swooped on behind the Storm Ravens and unloaded on them but only taking 2 hull points off of one. The Spore of the Doom blows up an empty Razorback, but the Devilfex only scores two hull points with a poor Armor Pen roll. Trygon shoots at Razorback but fails to glance. **Fail encounter of the Game: Ymgarls Assault. The Ymgarls were in the terrain 12.1" away from the Coteaz Blob. I did this to keep Coteaz from getting his Ingore Cover/Twin Linked Blob shooting at me from coming in from Reserves. I move out of terrain and make the charge into the Marines. He kills one on Overwatch, and I kill two on the Charge. Then he swings back killing one more of my Ymgarls. Roll leadership and he fails, falling back out of combat. I roll to catch and he rolls a 6, I roll a 1. Marines fall back 7". On his next turn, Move, Shoot, Ymgarls DIE! Grey Knights Turn 3: Wounded Storm Raven zooms off of the Board and the other one Kills the other Tervigon. I had moved most of the Termagants out of 6" so I didn't lose very many to Brood Progenitor. The Storm Raven Hovers and pivots to shoot at my Termagants with a Hurricane Bolter, and combined shooting from the Razorbacks left me with 3 units of 3 Termagants and no Devilgants. Doom dies to a Lascannon from Coteaz, and the Spore Pods die to Autocannon fire from the Psyfle Dreads. Take a few shots from the Razorbacks, but no wounds and they pass their grounding tests. Tyranid Turn 3: One Flyrant shoots and blows up a Razorback, The other one glances one twice. The Trygon moves toward the Hovering Storm Raven, and the Carnifex shoots and destroys the wounded Razorback. I successfully cast Endurance on both of the Flyrants. I had to go to ground with both Termagant units and snapshots failed to kill the Warrior Acolyte unit. The Trygon fails the re-roll assault on the Storm Raven. Deathleaper goes into reserves. Grey Knights turn 4: Storm Raven comes back from Reserves and grounds one Tyrant. The Psyfle Dreads remove him from play. Strike Squads move up and are about 12" from the Relic. The Storm Raven unloads on the Trygon taking 3 wounds off and the Assault Cannons and Plasma Cannons from Coteaz take the remaining 3. The Assault Cannons from the Razor on my right (Near the Aegis) take away the remaining wounds on the Devilfex. Tyranids Turn 4: I move up and take the Relic with a 3 man unit of Termagants. My other 3 man unit and the returning Deathleaper are hiding in the ruins. My plan was to deny him the Relic with an assaulting Deathleaper on turn 5 if necessary. My Warlord Flyrant moves up and shoots down the Storm Raven behind him. I'm down to just the 2 units of Termagants and the Deathleaper. Grey Knights Turn 5: Warlord flyrant is grounded by Psyfle Dreads causing two wounds and the n losing a 3rd to grounding. I pass an amazing amount of FNP saves from the rest of his army, but I lose the Termagants holding the Relic. The Deathleaper is out of LOS from most of his army, but the Storm Raven takes off two wounds with all of his shooting. Tyranid Turn 5: The Warlord Flyrant rolls Perils of the Warp Killing himself while trying to cast Endurance on himself. LOL!!! The Termagants roll too low to reach the Relic out of Terrain, so I leave them in cover. The Deathleaper moves as close as he can staying out of LOS. **Note - If no one gets the Relic, then we will tie. Which means a minor loss for me instead of a Major Loss. I'm hoping the games ends here... alas, we roll to continue to Turn 6 and I have to give my opponent the official handshake as he is within 6" of the Relic and the Storm Raven has clear LOS to the Deathleaper and my Termagants. It's not worth rolling it out. Grey Knights WIN 16:5 Tyranids: 5 VP for finishing early Grey Knights: Relic: 3 VP HQ: 2 VP Elite: 2 VP FA: 2 VP HS: 2 VP Finish Early: 5 VP On the bright Side...the guy I played received the highest score for an Army of One (Single FOC, No Allies), so it was ok to lose to him. Stay Tuned for Game #3 Vs. Chaos Demons |
|
|
|
Post by rpricew on Sept 26, 2012 16:34:57 GMT
Game #3 Vs. Chaos Demons Scenario was Hammer & Anvil/Purge The Alien - Primary, Table Quarters - Secondary His List: Fateweaver 2 Demon Princes with wings BloodThirster (2) 3 man units of Flamers 3 Screamers (2) 10 man Bloodletters 6 Pink Horrors 6 Hounds with upgraded hound I won the roll, but decided to let him go first. This way I could react to his demons coming in. Both of our Warlord Traits were useless in this game. I don't remember what they were. I did however roll well on the Biomancy chart, getting only one Life Leech (as opposed to my usual 4 of them). Everybody either got Iron Arm or Endurance (no enfeeble though) Fateweaver is marked by Deathleaper and is so scared his leadership is reduced by 3 to a 6 (Why couldn't I have gotten this against the other two armies... LOL) I deploy in terrain on my end of the board, pushed up as far as I could go to the 24" mark, making a ring around my Tervigons, spreading out as much as possible to avoid the Flamers. 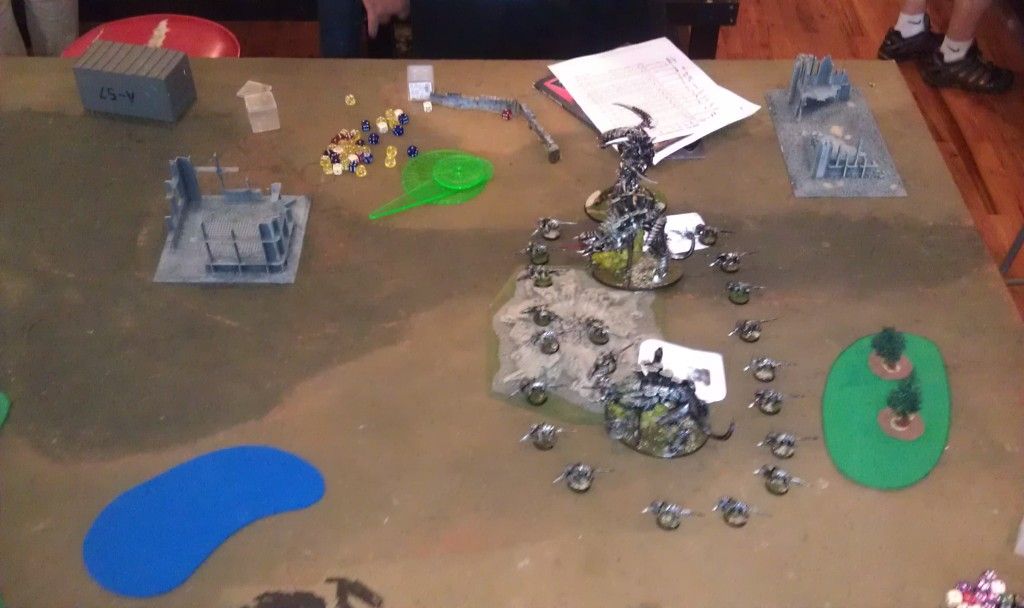 Demons Turn 1: He gets the wrong half in, and decides to stay back a little while waiting on the rest of his guys to come. He moves up into both pieces of Area Terrain to block the Ymgarls. At the last second he moves his Demon Prince out of Terrain exposing a hole big enough for Ymgarls. I don't know what his plan was, but I didn't let him know his mistake yet. Tyranid Turn 1: I spawn Termagants with one unit making 16 and burning out. This unit moves toward my near edge holding the left flank. I cast Endurance on both of my Tervigons and move up just a little bit. Demons Turn 2: Everything but the hounds come in. He positions the Pink Horrors & Flamers so he can kill some Termagants. I lose a few. He moves up his Bloodletters on his near edge and greedily eye my Tervigon with them and the Bloodthirster. Tyranid Turn 2: Everything but Deathleaper & Ymgarls come in. Success for me, so I didn't have to risk losing the Ymgarls to him occupying terrain. I make 14 Termagants from the Tervigon on the far side and spread out into the table quarter on his side. Doom comes in next to Fateweaver, a Demon Prince, The Bloodthirster & a unit of Flamers. The Spore attacks and caused a wound on the Demon Prince. Fateweaver rolls 13 on his leadership test but passes all of his invulnerable saves! Doom only gains 4 wounds from the Flamers killing two. He launches a Cataclysm at the Bloodletters, killing a few. The Devilfex comes in on the near side in his deployment zone. I shoot down the other set of Flamers with him. The Devilgants in the front shoot and kill the Pink Horrors. The Two Flyrants come in together up the far side and unload into a Demon Prince and the Screamers killing them all. I had deployed my Trygon on the far table side and had him up just to be ahead of the Tervigon. (Trying to tempt the charge on him, instead of the Tervigon.) The Ymgarls appear in the middle of the board and assault the Demon Prince in combat with the Doom. This round of shooting get's me FIRST BLOOD Demons Turn 3: Everything moves forward. He assaults the Bloodthirster & Bloodletters into the Trygon, and wind up killing him. He assaults the Doom with a Demon Prince, he forgets to smash and the Doom of course passes all of his invulnerable saves. The Hounds come in and prepare to charge either the Devilfex, who had been shooting at the Bloodletters holding is table Quarter or the Ymgarls swinging on the Demon Prince. Tyranids Turn 4: I spawn 14 more Termagants and my opponent is just beside himself, since now Fateweaver, the Bloodthirster & the Bloodletters are surrounded by Gants and two Flyrants. Let's just say that it didn't go well for the Bloodletters & Fateweaver. Shooting forced a leadership check on Fateweaver and he disappeared back into the warp (thanks to the Deathleaper, who was sitting in the back considering whether or not to make a LINE BREAKER move or not). The Bloodletters felt the sting of an Uber Termagant assault and crumbled. I move into two table quarters claiming the Secondary Ojbectives. The Devilfex shoots and kills a couple of the hounds. Demons Turn 5: The Hounds assault the Ymgarls, while the Doom sucks a couple of the hounds into his soul. The Demon Prince falls to the Doom headbutting him with Str 10 attacks. The Bloodthirster assaults the Devilgants wiping them out. He is down to one 6 man unit of Bloodletters, the Hounds in assault with Ymgarls & the BloodThirster at this point. Tyranids Turn 5: Devilfex shoots and kills all but 2 Bloodletters. The Devilfex & Pod give me LINEBREAKER The two Tyrants, the Tervigon and 25 Termagants all unload into the BloodThirster and he goes down to shooting. I literally had him surrounded on all 4 sides and this get's me SLAY THE WARLORD The Doom eats the last two Hounds and he offers his hand in concession ending the game with only two Bloodletters left alive. 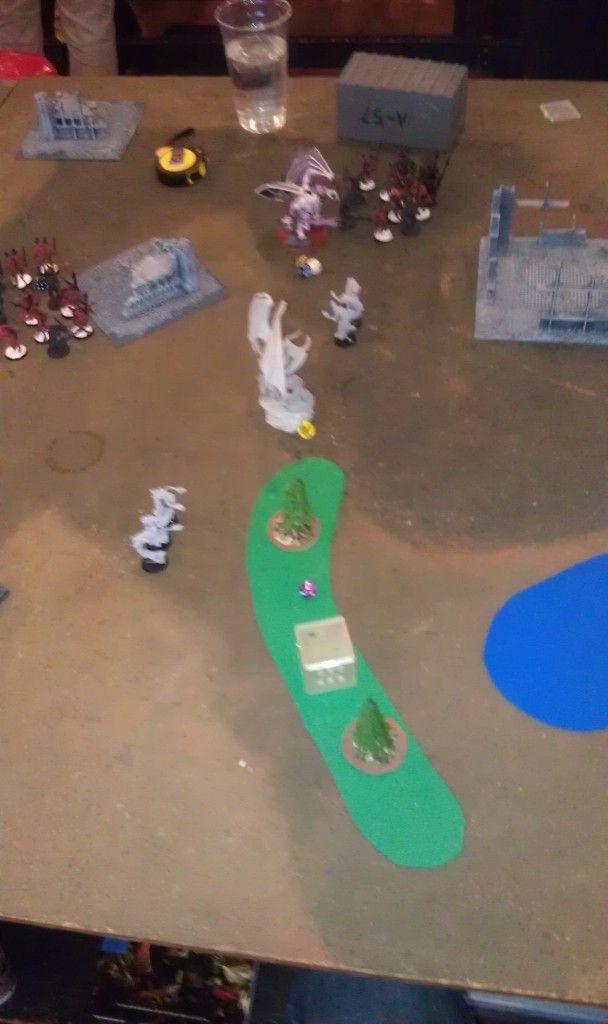 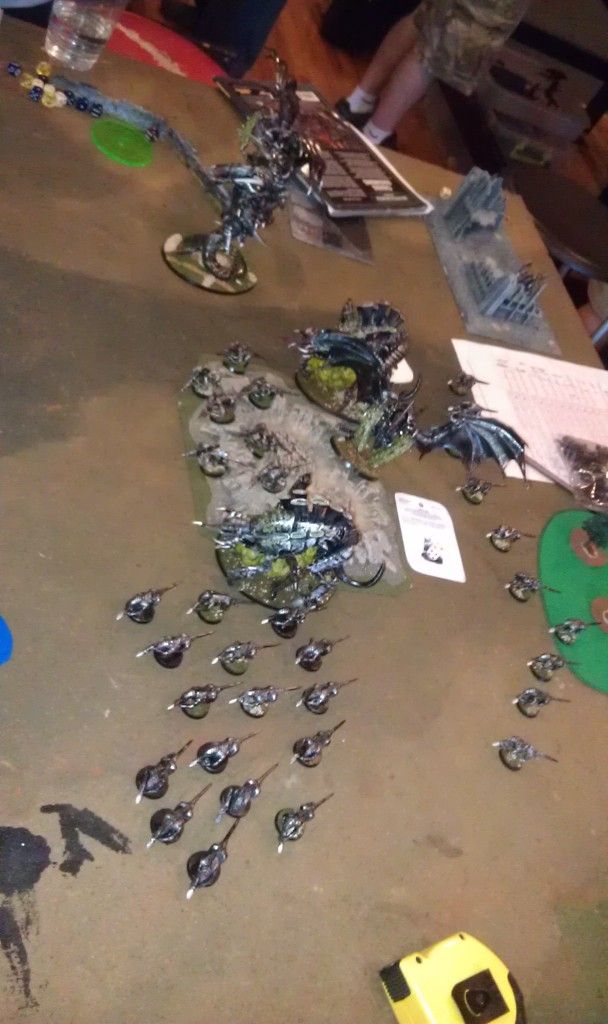 TYRANIDS WIN - Massacre 30 points TYRANIDS WIN - Massacre 30 pointsThis game came down to good powers, good spawning and my opponent was too conservative in turn 1-2. I overwhelmed his big bugs with little bugs, which left my big bugs alive to do their work. with all of the points accumulated from the 3 games I came in 6 out of 20 overall. A much better showing than the last Tournament, where I was 2nd from the bottom. Hope you enjoyed my Batreps. The Alpha Strike list is working great. It's main weakness is opponents with massive amounts of shooting covering their Flanks in a corner and keeping you on the outside of their ranks. Also, if it comes in piecemeal, then it dies piecemeal and the "Shock Value" is lost! |
|
|
|
Post by rpricew on Sept 27, 2012 18:44:11 GMT
Here we are with a couple of Battle Reports. Some of the Guys at my LGS have accused me of not bringing "Friendly Tyranid" lists since 6th Edition. As this thread suggests I have been tweaking the Alpha Strike list to be competitive in 6th edition in my Meta. I believe that this has officially happened with this decree from the LGS. So last night I went there and played a couple of Friendly GamesMy 1500 point "Friendly Army List": HQ: Flyrant (Dual TL Devourers, 2 Biomancy Powers) Elite: 3 Hive Guard 3 Zoanthropes (one with 2 Biomancy powers) Fast Attack: 6 Raveners (Rending Claws, Devourers) 5 Shrikes (Dual Boneswords, Toxin Sacs) 10 Gargoyles (Toxin Sacs, Adrenal Glands) Troops: 3 Warriors (Deathspitters, Scything Talons, Toxin Sacs) 3 Warriors (Deathspitters, Scything Talons, Toxin Sacs) Heavy: 2 Biovores 1500 points 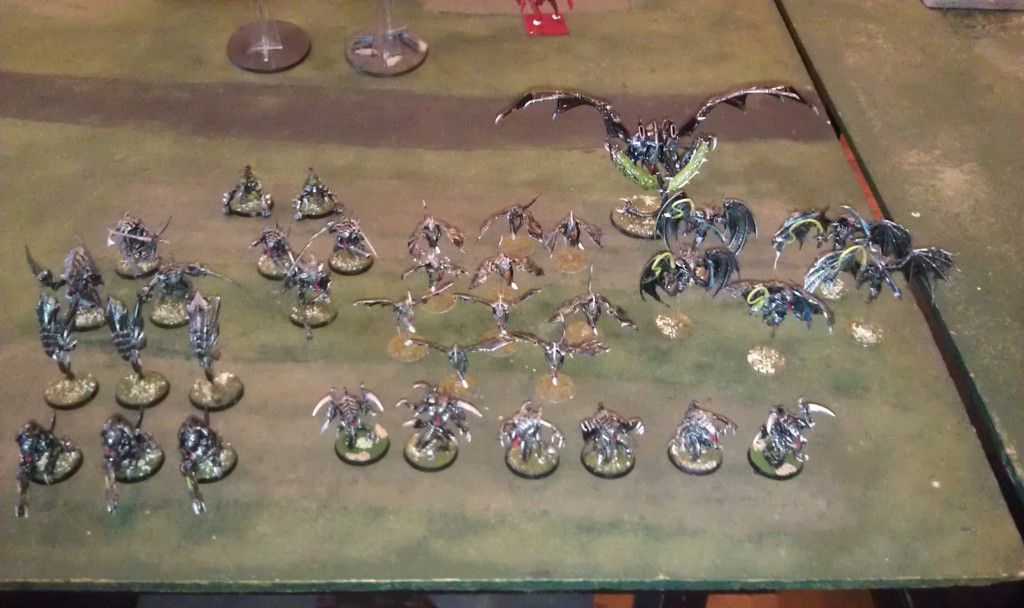 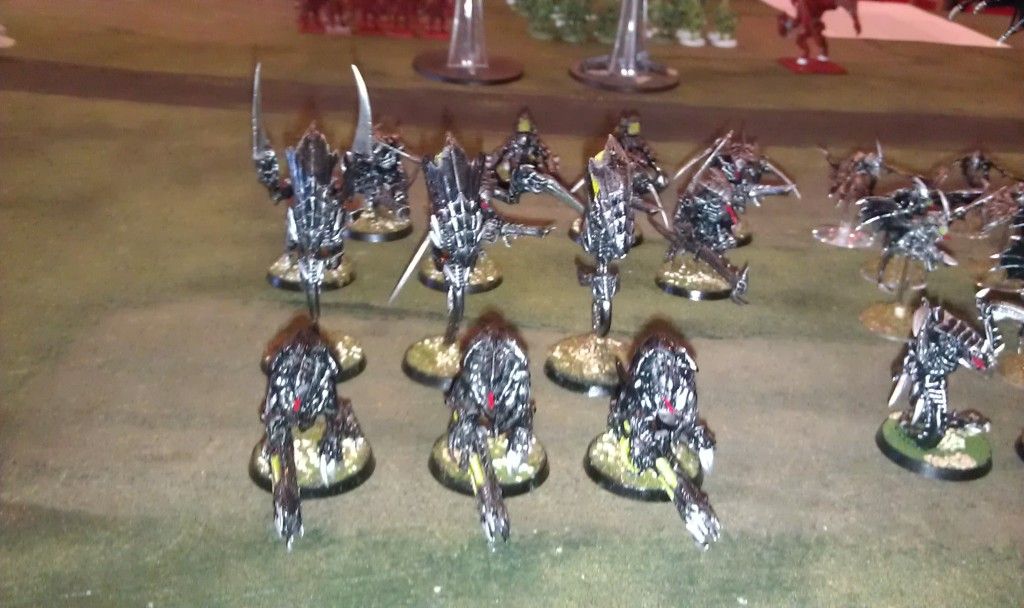 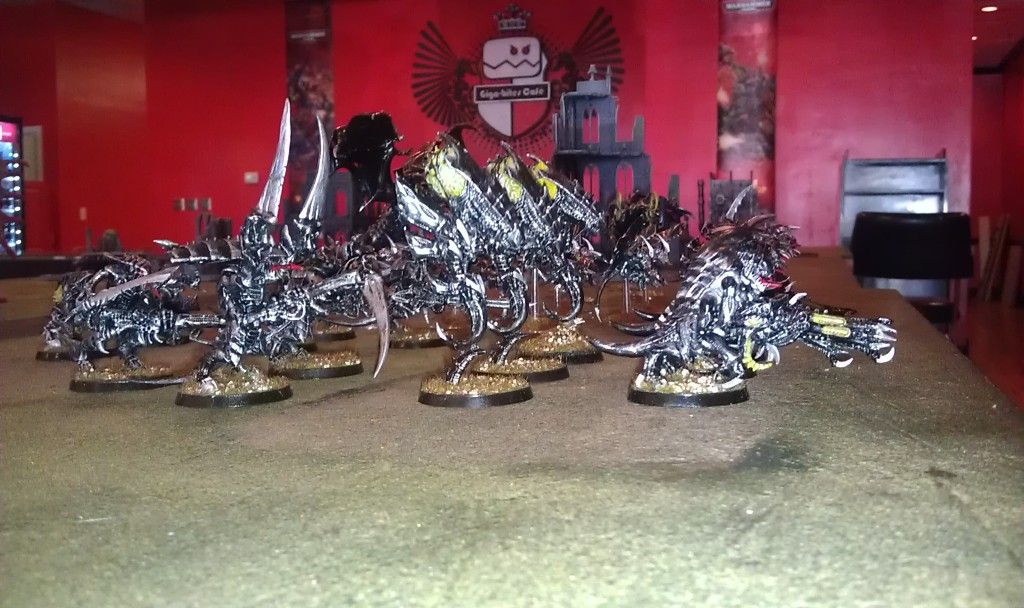 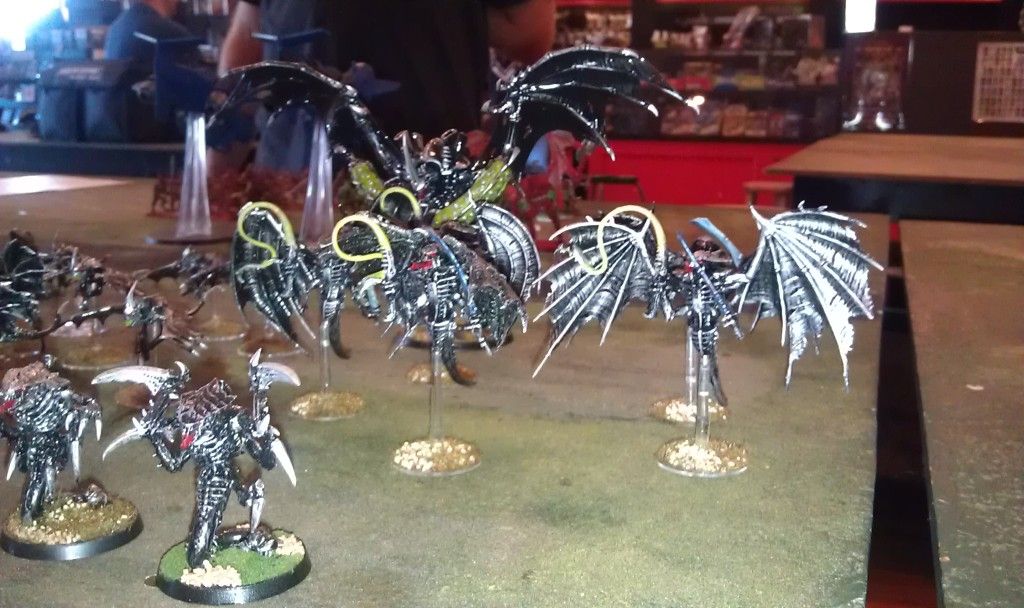 My opponent was Chaos Demons His list was: HQ: Bloodthirster Herald of Nurgle (Flamer) Herald of Nurgle (Flamer) Troops: 12 Bloodletters 12 Bloodletters 9 Plaguebearers 9 Plaguebearers 9 Plaguebearers 9 Plaguebearers Fast Attack: ForgeWorld Blight Drone (Proxy Storm Talon) ForgeWorld Blight Drone (Proxy Storm Talon) 1499 points (I think)  Mission/Deployment: Hammer & Anvil/The Crusade w/ 4 Objectives (we rolled) Mission/Deployment: Hammer & Anvil/The Crusade w/ 4 Objectives (we rolled)The objective near me was +1 Cover Save. The one on my near side was Sabotaged, the one in the middle was Sabotaged, and the one on my left was Grav Wave Generator. Tyranid Deployemnt: I took First Turn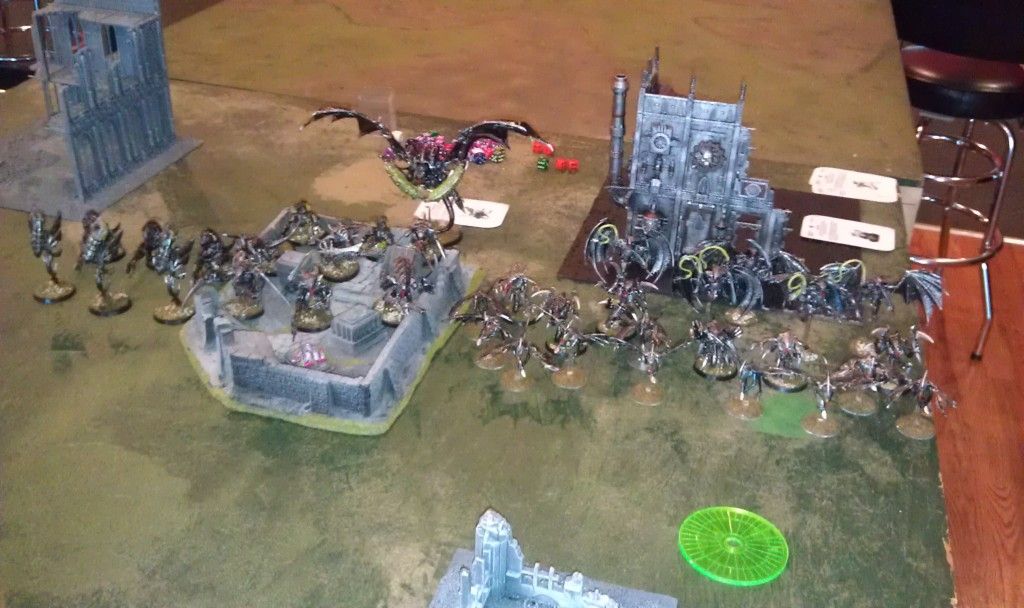 Tyranids Turn 1: I cast powers on my units and move up a little. The Zoanthrope got Iron Arm and Endurance and the Tyrant got Enfeeble and Warp Speed. Endurance on the Tyrant. Demons Turn 1: The preferred units come in. Bloodletters, Blight Drones & Bloodthirsters. They all deep strike away from me and run to avoid the Biovores Blast. One Blight Drone shoot at the Flyrant but score no wounds or grounding. The other one kills a Warrior unit in area terrain holding the objective. Tyranid Turn 2: Shooting from the Warriors, Zoanthropes, Biovores kill 5 Bloodletters and the Shrikes move up to assault. The Hive Tyrant downs one of the Blight Drones. The Shrikes fail their assault by 1" and I have to assault with the 3 man Warrior unit. We tie up in combat, him killing one Warrior and me killing 2 Bloodletters. Demons Turn 2: 2nd Wave all come in. The Plaguebearers all deepstrike into or around terrain exposing all of the other objectives. The 2nd Blight drone shoots and kills 3 Shrikes with its Str 8 Ap3 Large Blast marker. Combat with the Bloodletters and Warriors is poor on both sides. The Bloodthirster moves up as Jump Infantry and assaults the Gargoyles, killing 5. Because I was spread out to maximum coherency, I wasn't able to strike back at the Bloodthirster after 3" pile in move. 2nd Bloodletter unit assaults the Zoanthropes killing one and wounding the other. (I remove the normal Zoanthropes first keeping my Psyker alive) Tyranids Turn 3: Hive Guard, Biovores and 2 man Warrior unit consolidate into terrain holding objectives. Shooting at one unit of Plaguebearers kills most of them. And the Biovores shoot and kill 5 of the ones close to the Warrior locked in combat with the Bloodletters. Raveners assault the Bloodthirster and lose 3 after causing only one wound. (He hits at Str 8 ignoring armor) Shrikes assault the Bloodletters and I whiff on all of my attacks. The Bloodletters, Warriors and Shrikes just keep swinging but nothing is Dying. Flyrant kills the other Blight Drone. Zoanthrope casts Iron Arm on himself and buffs his unit to Toughness 6. His unit only takes one wound from 8 Bloodletters and the 2nd Zoanthrope dies. I kill 2 Bloodletters in return due to Str 6 attacks. Demons Turn 3: Plaguebearers assault and kill the Warrior locked in combat. Shrikes kill one Bloodletter (leaving one) and 2 Plaguebearers. No wounds on the Zoanthropes in combat and I kill one more. The Bloodthirster finishes off the Raveners but is still locked in combat with the Gargoyles. Other Plaguebearers move towards objectives but are Slow and Purposeful so they are taking a long time to get there. (This was a mistake on his part, since he should have deepstruck closer to the objectives) Tyranids Turn 4: Hive Tyrant shoots & assaults a unit of Plaguebearers, but losees 2 wounds due to poison 2+ when he charges in. We stay locked in combat with only the Herald alive with 1 wound left. Shooting from the Hive Guard, Biovores and Warriors kill most of a Plaguebearer unit leaving only 2. On this round of combat, the Shrikes die finally leaving one Bloodletter & three Plaguebearers alive. Zoanthrope rolls perils of the warp and takes a wound. The Bloodletters finish off teh Zoanthrope in close combat and consolidate towards my Warriors in terrain. Demons Turn 4: Bloodthirster finishes off the Gargoyles and moves towards the Hive Tyrant. Plaguebearers roll snake eyes to move through cover into area terrain in the middle trying to capture the middle objective. The Bloodletter from the first assault with the Warriors moves into my deployment zone for LINEBREAKER. The other unit of Bloodletters assaults my Warriors killing both of them and consolidating into the terrain by my objective. Flyrant finishes off the Herald and consolidates towards the Bloodthirster. Tyranids Turn 5: Flyrant casts Warp Speed on himself and shoots/Assaults the Bloodthirster at Initiative 8 and 8 Attacks on the Charge w/ Toxin Sacs. The Bloodthirster is wounded 6 times and fails his last 3 saves. The Hive Guard/Biovores make a last ditch effort to kill the Bloodletters shooting and killing 4-5. I then decide to assault the remaining 4-5 to try and block the objective. I miss on all of my attacks and he wounds me back. I die to sweeping advance and he consolidates onto my objective. (BOO) Demons Turn 5: The Plaguebearers finally get into terrain and capture the middle objective. At this point, the score is 3+3+1 for Demons and 1+1 for Tyranids. My opponent asks if I want to concede and I say let the dice decide. We roll for turn 6 and the game continues. Tyranids Turn 6: Hive Tyrant clears off the middle objective with Shooting. Now the Score is Demons 3+1, and the Tyranids are 1+1 still. Demons Turn 6: He makes an excellent move through cover roll with his Plaguebearers and gets a 2nd unit within 3" of the final objective. Game ends and the Demons win. 4:2 Taking one objective and Linebreaker with Tyranids getting Slay the Warlord and Linebreaker. |
|


 Hence the new list without Raveners.