Post by tag8833 on Nov 10, 2014 1:13:33 GMT
2nd Batrep completed: thetyranidhive.proboards.com/post/823292/thread
I ran a test with my no-flyrant drop pod list yesterday against a mildly fluffy CSM list. The Tyrannocyte specific stuff is Blue.
My List:
CAD:
Tyrannocyte (VC)
Tyrannocyte (VC)
Tyrannocyte (VC)
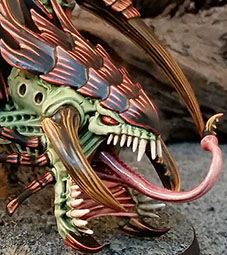
Tyranid Prime (TS, LW + BS, FH, AG)
Malanthrope
17 Hormagants
20 Termagants (10 Fleshborers, 10 Devourers)
20 Gargoyles
Tyrannofex (EG)
Mawloc
Carnifex (2 TL-Devourers)
Living Artillery Node:
3 Warriors(BS)
Exocrine
3 Biovores
Aegis Line w/ Quad gun
His List:
This is approximate because I'm not the most familiar with CSM.
Chaos Lord (Mark of Khorne, Demon Weapon that gave +2 Stength and D6 extra attacks)
Daemon Prince (Burning Brand, Khorne, Power Armor, Wings)
15 Khorne Berzekers w/ a Champion (Power Weapon)
5 Plague Marines in a Rhino (Dozer Blade)
5 Plague Marines in a Rhino (Dozer Blade)
10 Cultists
10 Cultists
Heldrake
Chaoes Land Raider (Dozer Blade) <- I think this was a forgeworld variant, because it had all of the Khorne Bezerkers and the lord inside it.
Forgeworld Predator w/ 2 TL-Heavy Bolters, and a Torrent)
3 Obliterators
Mission: Maelstrom (Tactical Escalation).
Deployment (Hammer and Anvil):
I deployed 1st, and put out my Aegis line at my deployment edge. I had the Malanthrope on the Quad gun in the middle with the Exocrine on one side and the Carnifex on the other, and the biovores trailing out behind. The warriors were to the Carnifex side. The Gargoyle were flanked beside the Exocrine with a little conga-line to get shrouded from the Mawloc.
I put the Termagants, Tyrannofex, and Hormagants w/ Tyranid Prime in Tyrannocytes, and left them and my mawloc in reserves.
He counter deployed me well with the Land Raider move up the middle toward the Malantrhope, and the Rhinos on the same flank as the Gargoyles, but also behind a large piece of terrain that was giving them cover saves against the Quad Gun. The Predator was between the Rhinos. Inexplicably he put the cultist right out in the open on his deployment edge. To the flank away from the gargoyles. I guess his reasoning was so that he could run them toward Maelstrom objectives early.
Turn 1:
I went first. My biovores evaporated a squad of cultists, while my warriors did some damage to the other squad and pinned it. I advanced the Carnifex onto terrain, but left him just in range of the Malanthrope so that he would have a 3+ cover. The Gargoyles moved forward onto terrain and conga lined back to the Malan for a cover save. Otherwise things sat where they were and took pot shots.
On his turn he advanced his rhinos, Land Raider, and Predators. He glided his Demon Prince onto the terrain piece facing down my Carnifex. As I had hoped, he disembarked the plague marines, and fired pretty much everything into the gargoyles. The torrent on the tank did good damage, but I rolled well on saves vs the rest. Lost about 12 Gargoyles. The Demon prince put a wound on my Carnifex, and then attempted to charge and took a wound from overwatch. He failed the 10 inch charge. I don't know why he attempted this.
Score
Tyranids: 2 (first blood)
CSM: 0
Turn 2:
All of my reserves came in. The Mawloc hit! on top of 5 plague marines, and did 5 wounds, but he made 2 FNP rolls. So he did 2 more wounds, and they made both FNP. So he mishapped and died. My Termagants came in behind the Rhinos. They scattered a bit, but there wasn't anywhere for them to go so they basically hit the target. The Tyrannofex came in in front of the Rhinos. My warlord came in beside the Demon prince, but behind a rhino as well so that the pod could pop it. I advanced my Carnifex right at that demon prince, considering a charge if shooting took it down to 1 wound. The Gargoyles advanced to the 2 remaining marines that the Mawloc left. Everything else stayed gunlined up.
My Tyrannofex started shooting. He hit a Marine, the predator (primary Target), and a Rhino with both templates, but only managed to take a hull point of the rhino. Then my Termagants opened up and killed the predator. My Tyranid prime, Exocrine, and Carnifex all fired into the Deamon prince, and killed it. Honestly, the Exocrine did all the work. (4 wounds, 3 failed jinks). The warriors killed a couple cultists, but failed to pin this time. Quad gun failed to hit a rhino which would have gotten a good cover save. The bioves Killed 4 plague marines.
Then came the 3 Tyrannocytes. They each had 5 small blasts that had to fire at the closest target. One shot at the remaining plague marine and managed to kill it, and also 3 Termagants (Scatter). One shot at the back of a rhino, and did one hull point to immobilize it. It also killed 3 Termagants, a Gargoyle, and 2 Hormagants. The last one shot at the same rhino, but was hitting front armor. It killed 4 Hormagants. This was a thoroughly frustrating affair. Having to roll 15 times for scatter, and it was scattering all over the place. Because I had gobs of gribbles in the vicinity, I took more damage than my opponent.
In assault, my 7 remaining gargoyles charged into the 2 remaining plague marines where they would stay for quite some time.
On his turn 2, his heldrake came in (I should have interceptored it with the quad gun, but forgot I could). It killed 4 termagants (leaving me all 10 Devourers, but no more fleshborers). His Oblits came in behind my Biovores and killed one. He advanced his Land Raider towards my Aegis, and disembarked. The Lord split off to tangle with my malanthrope, while the Bezerkers went after my Warriors. Shooting did nothing with a 2+ cover save. He actually failed both of his charges (A 2" charge over the Aegis he rolled a 3, and a 1" charge over the aegis he roll snake eyes). I felt bad for him, so I just told him to play as if he made the charges. In assault, they killed 1 warrior, and I killed one Bezerker. The lord took a wound off of the Malanthrope. The Malanthrope's Challenge ability saved it.
Score
Tyranids: 4 (first blood)
CSM: 0
Turn 3:
There wasn't all that much todo. I headed my Hormagants toward the Bezerkers. My Termagants got in position to kill the immobilized rhino. The Carnifex moved toward the land raider. The TFex fired both templates at the rear armor of the remaining Rhino, and did 1 wound. It only had 1 hull point left, so he changed it, but did 6 wounds. HOW + 4 Attacks didn't roll a 4+ to kill the damn thing. The biovores moved up to take the quad gun, and took 2 wounds off the Heldrake shaking and stunning it. The Carnifex also shot at it, but it saved the only glance. The Exocrine did 3 wounds to the Obliterators. In assault my warriors killed another Bezerker then died. The Malanthrope died..
NOTE: I forgot to shoot the Tyrannocytes.
On his turn. He put his bezerkers back into the land raider and claimed an objective with it. He also got his cultists onto an objective, and his living Rhino onto an objective to score ascendancy. His Lord assaulted my exocrine and did 2 wounds while saving the 1 wound I did back on his 4++.
Score
Tyranids: 7 (first blood)
CSM: 4
Turn 4:
There wasn't much to do. My Tyrannofex finally killed the rhino that had been vexing him. The Termagants scored an objective. The hormagants + Prime scored an objective. The quad gun finished the Heldrake, thanks to the Biovores making synapse.
With most things dead or locked in combat, it was time for the Tyrannocytes to do their thing. 1 was closer to the oblits, and the other 2 were closer to the Cultists. I did 7 wounds to the 2 oblits, and they failed 3 saves and died! At this point, a friend started chatting with my opponent. Because it takes so damn long to fire the Tyrannocytes. I rolled the 10 blasts on the Cultists. At the end there were something like 30, 4+ covers saves (GTG on area) for him to make on 8 cultists. It was absurd. The Cultists died.
Then it was time for Mr. Big Time. The Carnifex moved to charge the Land Raider. He did 1 glance with Hammer of Wrath, and 2 Pens with his attacks. One of the pens rolled an explode which killed 2 Bezerkers. In assault, my Exocrine took 2 wounds, and did 1 back.
On his turn his dwindling bezerkers charged my Dakkafex with a battle cry about how Khorne was going to be so pissed that they wrecked the car. 2 died to overwatch, and they did 2 wounds to the Dakkfex, and he did 1 back. His lord actually failed to wound the exocrine, but made his 4++.
Score:
Tyranids: 10 (first blood)
CSM: 4
Turn 5:
He just had 4 Bezerkers left, and the lord. So I sent the Biovore, and Tyrannofex in to help the Exocrine, and the Hormagants and Tyranid Prime to help the Dakkafex. The Tyranid Prime did his thing, and all of the Bezerkers died. More Surprising, the Tfex put 4 wounds on the lord, and he failed 3 saves and died (after killing the exocrine). Complete Tabling.
Final Score:
Tyranid: 17 (First Blood, Warlord, Line Breaker)
CSM: Tabled.
My Thoughts on the Tyrannocytes:
One test is not sufficient to arrive at long term conclusions, but They did what I wanted them to do. Got my stuff in position to pop tanks. However, their shooting with the blasts was so slow, and did more damage to my stuff than his on the turn they arrived. They dropped a mini deathstar next to his mini deathstars (Demon Prince, and Bezerkers in a Land Raider), but the Demon Prince died to shooting, and the Land Raider moved away, and it took several turns for me to catch the guys inside. Unless you are facing a really gunliney army, I am not sure that the pods are going to be a good Melee delivery system. Also, if you have them delivering gants, you should probably stick to deathspitters, or keep your distance more. I think I'm going to drop the Prime + Hormagants from my list in favor of a Flyrant for the next game. Maybe some zoeys and rippers.
I ran a test with my no-flyrant drop pod list yesterday against a mildly fluffy CSM list. The Tyrannocyte specific stuff is Blue.
My List:
CAD:
Tyrannocyte (VC)
Tyrannocyte (VC)
Tyrannocyte (VC)
Tyranid Prime (TS, LW + BS, FH, AG)
Malanthrope
17 Hormagants
20 Termagants (10 Fleshborers, 10 Devourers)
20 Gargoyles
Tyrannofex (EG)
Mawloc
Carnifex (2 TL-Devourers)
Living Artillery Node:
3 Warriors(BS)
Exocrine
3 Biovores
Aegis Line w/ Quad gun
His List:
This is approximate because I'm not the most familiar with CSM.
Chaos Lord (Mark of Khorne, Demon Weapon that gave +2 Stength and D6 extra attacks)
Daemon Prince (Burning Brand, Khorne, Power Armor, Wings)
15 Khorne Berzekers w/ a Champion (Power Weapon)
5 Plague Marines in a Rhino (Dozer Blade)
5 Plague Marines in a Rhino (Dozer Blade)
10 Cultists
10 Cultists
Heldrake
Chaoes Land Raider (Dozer Blade) <- I think this was a forgeworld variant, because it had all of the Khorne Bezerkers and the lord inside it.
Forgeworld Predator w/ 2 TL-Heavy Bolters, and a Torrent)
3 Obliterators
Mission: Maelstrom (Tactical Escalation).
Deployment (Hammer and Anvil):
I deployed 1st, and put out my Aegis line at my deployment edge. I had the Malanthrope on the Quad gun in the middle with the Exocrine on one side and the Carnifex on the other, and the biovores trailing out behind. The warriors were to the Carnifex side. The Gargoyle were flanked beside the Exocrine with a little conga-line to get shrouded from the Mawloc.
I put the Termagants, Tyrannofex, and Hormagants w/ Tyranid Prime in Tyrannocytes, and left them and my mawloc in reserves.
He counter deployed me well with the Land Raider move up the middle toward the Malantrhope, and the Rhinos on the same flank as the Gargoyles, but also behind a large piece of terrain that was giving them cover saves against the Quad Gun. The Predator was between the Rhinos. Inexplicably he put the cultist right out in the open on his deployment edge. To the flank away from the gargoyles. I guess his reasoning was so that he could run them toward Maelstrom objectives early.
Turn 1:
I went first. My biovores evaporated a squad of cultists, while my warriors did some damage to the other squad and pinned it. I advanced the Carnifex onto terrain, but left him just in range of the Malanthrope so that he would have a 3+ cover. The Gargoyles moved forward onto terrain and conga lined back to the Malan for a cover save. Otherwise things sat where they were and took pot shots.
On his turn he advanced his rhinos, Land Raider, and Predators. He glided his Demon Prince onto the terrain piece facing down my Carnifex. As I had hoped, he disembarked the plague marines, and fired pretty much everything into the gargoyles. The torrent on the tank did good damage, but I rolled well on saves vs the rest. Lost about 12 Gargoyles. The Demon prince put a wound on my Carnifex, and then attempted to charge and took a wound from overwatch. He failed the 10 inch charge. I don't know why he attempted this.
Score
Tyranids: 2 (first blood)
CSM: 0
Turn 2:
All of my reserves came in. The Mawloc hit! on top of 5 plague marines, and did 5 wounds, but he made 2 FNP rolls. So he did 2 more wounds, and they made both FNP. So he mishapped and died. My Termagants came in behind the Rhinos. They scattered a bit, but there wasn't anywhere for them to go so they basically hit the target. The Tyrannofex came in in front of the Rhinos. My warlord came in beside the Demon prince, but behind a rhino as well so that the pod could pop it. I advanced my Carnifex right at that demon prince, considering a charge if shooting took it down to 1 wound. The Gargoyles advanced to the 2 remaining marines that the Mawloc left. Everything else stayed gunlined up.
My Tyrannofex started shooting. He hit a Marine, the predator (primary Target), and a Rhino with both templates, but only managed to take a hull point of the rhino. Then my Termagants opened up and killed the predator. My Tyranid prime, Exocrine, and Carnifex all fired into the Deamon prince, and killed it. Honestly, the Exocrine did all the work. (4 wounds, 3 failed jinks). The warriors killed a couple cultists, but failed to pin this time. Quad gun failed to hit a rhino which would have gotten a good cover save. The bioves Killed 4 plague marines.
Then came the 3 Tyrannocytes. They each had 5 small blasts that had to fire at the closest target. One shot at the remaining plague marine and managed to kill it, and also 3 Termagants (Scatter). One shot at the back of a rhino, and did one hull point to immobilize it. It also killed 3 Termagants, a Gargoyle, and 2 Hormagants. The last one shot at the same rhino, but was hitting front armor. It killed 4 Hormagants. This was a thoroughly frustrating affair. Having to roll 15 times for scatter, and it was scattering all over the place. Because I had gobs of gribbles in the vicinity, I took more damage than my opponent.
In assault, my 7 remaining gargoyles charged into the 2 remaining plague marines where they would stay for quite some time.
On his turn 2, his heldrake came in (I should have interceptored it with the quad gun, but forgot I could). It killed 4 termagants (leaving me all 10 Devourers, but no more fleshborers). His Oblits came in behind my Biovores and killed one. He advanced his Land Raider towards my Aegis, and disembarked. The Lord split off to tangle with my malanthrope, while the Bezerkers went after my Warriors. Shooting did nothing with a 2+ cover save. He actually failed both of his charges (A 2" charge over the Aegis he rolled a 3, and a 1" charge over the aegis he roll snake eyes). I felt bad for him, so I just told him to play as if he made the charges. In assault, they killed 1 warrior, and I killed one Bezerker. The lord took a wound off of the Malanthrope. The Malanthrope's Challenge ability saved it.
Score
Tyranids: 4 (first blood)
CSM: 0
Turn 3:
There wasn't all that much todo. I headed my Hormagants toward the Bezerkers. My Termagants got in position to kill the immobilized rhino. The Carnifex moved toward the land raider. The TFex fired both templates at the rear armor of the remaining Rhino, and did 1 wound. It only had 1 hull point left, so he changed it, but did 6 wounds. HOW + 4 Attacks didn't roll a 4+ to kill the damn thing. The biovores moved up to take the quad gun, and took 2 wounds off the Heldrake shaking and stunning it. The Carnifex also shot at it, but it saved the only glance. The Exocrine did 3 wounds to the Obliterators. In assault my warriors killed another Bezerker then died. The Malanthrope died..
NOTE: I forgot to shoot the Tyrannocytes.
On his turn. He put his bezerkers back into the land raider and claimed an objective with it. He also got his cultists onto an objective, and his living Rhino onto an objective to score ascendancy. His Lord assaulted my exocrine and did 2 wounds while saving the 1 wound I did back on his 4++.
Score
Tyranids: 7 (first blood)
CSM: 4
Turn 4:
There wasn't much to do. My Tyrannofex finally killed the rhino that had been vexing him. The Termagants scored an objective. The hormagants + Prime scored an objective. The quad gun finished the Heldrake, thanks to the Biovores making synapse.
With most things dead or locked in combat, it was time for the Tyrannocytes to do their thing. 1 was closer to the oblits, and the other 2 were closer to the Cultists. I did 7 wounds to the 2 oblits, and they failed 3 saves and died! At this point, a friend started chatting with my opponent. Because it takes so damn long to fire the Tyrannocytes. I rolled the 10 blasts on the Cultists. At the end there were something like 30, 4+ covers saves (GTG on area) for him to make on 8 cultists. It was absurd. The Cultists died.
Then it was time for Mr. Big Time. The Carnifex moved to charge the Land Raider. He did 1 glance with Hammer of Wrath, and 2 Pens with his attacks. One of the pens rolled an explode which killed 2 Bezerkers. In assault, my Exocrine took 2 wounds, and did 1 back.
On his turn his dwindling bezerkers charged my Dakkafex with a battle cry about how Khorne was going to be so pissed that they wrecked the car. 2 died to overwatch, and they did 2 wounds to the Dakkfex, and he did 1 back. His lord actually failed to wound the exocrine, but made his 4++.
Score:
Tyranids: 10 (first blood)
CSM: 4
Turn 5:
He just had 4 Bezerkers left, and the lord. So I sent the Biovore, and Tyrannofex in to help the Exocrine, and the Hormagants and Tyranid Prime to help the Dakkafex. The Tyranid Prime did his thing, and all of the Bezerkers died. More Surprising, the Tfex put 4 wounds on the lord, and he failed 3 saves and died (after killing the exocrine). Complete Tabling.
Final Score:
Tyranid: 17 (First Blood, Warlord, Line Breaker)
CSM: Tabled.
My Thoughts on the Tyrannocytes:
One test is not sufficient to arrive at long term conclusions, but They did what I wanted them to do. Got my stuff in position to pop tanks. However, their shooting with the blasts was so slow, and did more damage to my stuff than his on the turn they arrived. They dropped a mini deathstar next to his mini deathstars (Demon Prince, and Bezerkers in a Land Raider), but the Demon Prince died to shooting, and the Land Raider moved away, and it took several turns for me to catch the guys inside. Unless you are facing a really gunliney army, I am not sure that the pods are going to be a good Melee delivery system. Also, if you have them delivering gants, you should probably stick to deathspitters, or keep your distance more. I think I'm going to drop the Prime + Hormagants from my list in favor of a Flyrant for the next game. Maybe some zoeys and rippers.